

Owning a new tablet is exciting. But to get the most out of your device, you need to set everything up properly. Here's a brief list of things you should do before you start using your new iPad tablet.
Restore or sync data from another tablet
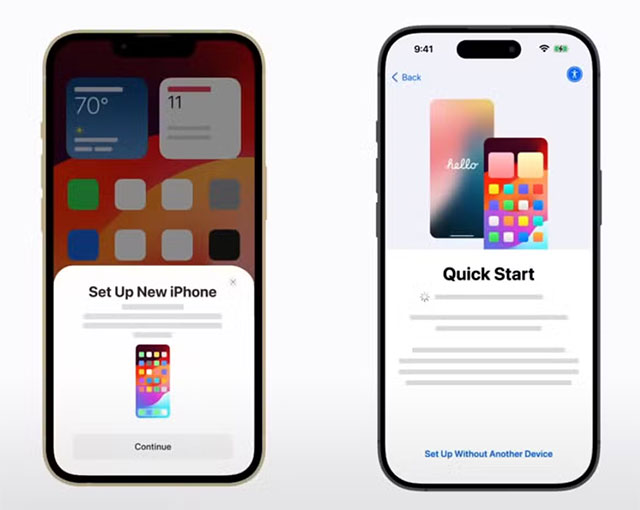
The first thing you should do after buying a new iPad is restore or sync data from another device, such as your older iPad or current Android tablet.
If you need to recover data from your old iPad, use the Quick Start feature that appears when setting up your new iPad. Quick Start works on both new iPhones and iPads, giving you the option to directly restore data from your previous iPad or download and restore an iCloud backup.
Alternatively, you can use a wired connection to your old iPad or computer (Mac or Windows PC) to synchronize data with a previously created backup. Whichever method you choose, data migration will usually only take 20 to 30 minutes (or longer if the backup is large).
Check for Software updates
Typically, setup includes upgrading to the latest version of iPadOS. However, in case your iPad is not receiving updates, you should manually check for updates and download them if available. This way, your device will be updated with the latest features, security patches, and bug fixes, and perform as well as possible.
After restoring the backup on the new iPad, go in Settings > General > Software Update and check if there are any software updates available. If a new version of iPadOS is available, consider downloading and installing it for the best iPad experience.
Pair Apple Pencil (and other peripherals)
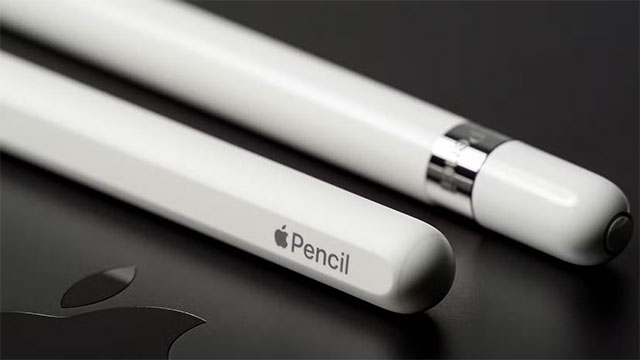
The next thing you should do is pair your Apple Pencil (if you have one) with your new iPad. Depending on your available iPad and Apple Pencil model, you may follow one of the following methods.
If you have an Apple Pencil (1st generation), plug it into the Lightning connector on an iPad with a Home Button or a USB-C port (via a USB-C to Apple Pencil adapter). If you're using an Apple Pencil (2nd generation), attach it to the magnetic connector on the side of the iPad.
Apple Pencil (USB-C) can connect directly to the USB-C port of a supported iPad or via an extension cable. If your Apple Pencil won't pair with your iPad, consider leaving it plugged in to charge for a while and then try the process again. Likewise, pairing Apple peripherals, like the Magic Keyboard or AirPods, is also very easy.
To connect third-party accessories, like Bluetooth speakers or game controllers, you must open the Bluetooth settings menu, put the accessory into pairing mode, then tap the accessory name when it appears in Bluetooth device list.
Set up Touch ID or Face ID
If you haven't set up Touch ID or Face ID yet, you should do so when you start using your new iPad. This adds an extra layer of security and convenience to your iPad, as unlocking the device, downloading apps, or authorizing payments can be done through biometric authentication.
To enable Touch ID, go to Settings > Touch ID & Passcode and set up this feature by scanning your fingerprint. If you want to use Face ID on your new iPad, go here Settings > Face ID & Passcode > Set up Face ID and follow the on-screen instructions to complete the process.
Customize wallpaper
Customize your tablet to your liking. You can change the wallpaper by going to Settings > Wallpaper > Add new wallpaper and select the available options.
You can choose a background image from the Photos, Photo Mix, and Animations libraries, along with other options. Additionally, you can create emoji templates, local weather images, or choose from one of the featured sets, including Collections, Astronomy, Weather.
Set up your Home screen to your liking
For example, if you like a clean and minimalist home screen with only essential app icons, consider hiding unnecessary apps from your iPad's home screen by pressing and holding an app icon and then using Use button “Delete the application“.

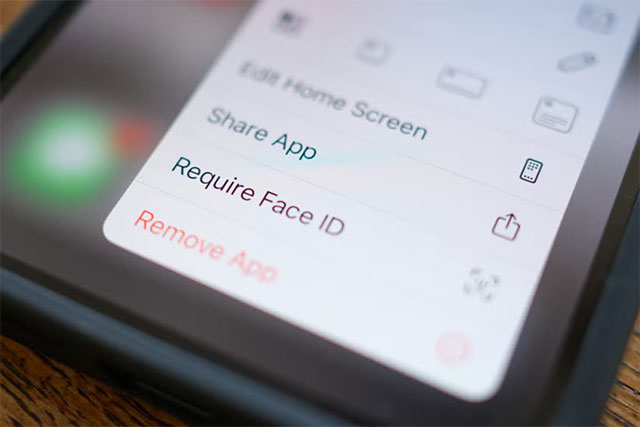
Apps removed from the Home screen still appear in the App Library. To completely hide an app on your new iPad, tap and hold the app's icon, select “Requires Face ID” (or Touch ID or Code). This will make the app appear as if it's not on your device, perfect for hiding it from prying eyes.
To see the list of hidden apps, go to App Library and scroll to the bottom, then tap the “Hidden” category. You can unhide an app by tapping and holding its icon here and reversing the process.
Customize Control Center (Control Center)
With iPadOS 18, Apple has revamped Control Center to be more customizable. While it looks and feels different from the Control Center on older iPadOS variants, the tiles and controls are familiar. While the default control setup is pretty good, you can rearrange, delete, resize, and add more controls or entire Control Center pages.
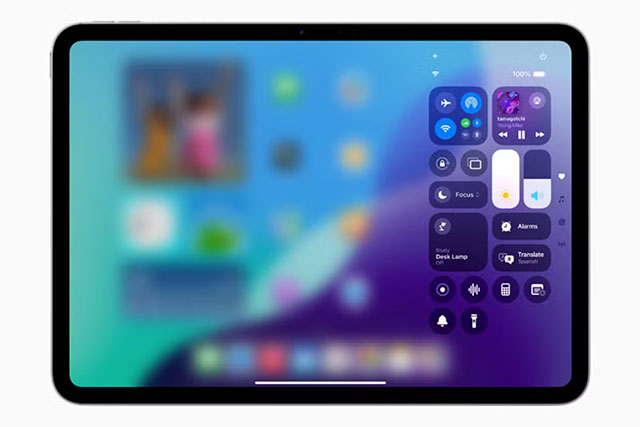
To customize Control Center on the new iPad, open Control Center by swiping down from the top-right corner of the screen and tapping the plus icon in the top-left corner of the interface. Now, you can drag a control to change its position, tap the minus sign in the upper-right corner of a control to delete it, or drag the handle in the lower-right corner to change the size of a control. Kneel and choose.
You can add more controls by tapping “Add control” and selecting one of the available options. If you want, you can add an entire Control Center page with the controls you want to include. Just tap the plus icon at the top right, select the circle icon to the right of the controls, and add the options you think are necessary.
Change screen resolution
Although you can't directly change the native resolution of the iPad display, there is a feature on iPad Air (5th generation), iPad Pro (11-inch, 1st generation and later), and iPad Pro ( 12.9 inches, 3rd generation or later) allows users to expand their workspace to accommodate more windows and content on the screen.
This feature is called Screen Zoom and is located within Settings > Display & Brightness > Screen Zoom. Once in, select the “More Space” feature. This feature shrinks all visual elements on the screen (making them proportionally smaller), making it look as if you've increased the resolution.
Set up a Safari Profile
If you want to differentiate between groups of tabs in Safari, like tab groups for work, education, or personal, consider creating a Safari Profile. Each profile has its own search history, cookies, site data, and extensions. To create a profile, go to Safari > Create Profile or Safari > Settings > Profile.
Click on the option “Start using profile“, then add basic details like name, symbols, colors, and favorites. Finally, press the ” buttonCreate profile“. When you create a profile, the Safari toolbar displays a button with that profile's name. If you create multiple profiles, you can tap this button to switch to another profile.
Enable 80% charging limit
On the latest iPad Pro (M4) and iPad Air (M2), you can set the charge limit to 80%, which helps extend the overall life of the battery. This feature works in the same way as on the new iPhone.
While the iPad stops charging when the battery reaches 80%, it will continue charging if the battery level drops to 75%, recharging to 80%. To enable this feature, go to Settings > Battery > Battery status and turn on 80% limit.
This is a great way to extend battery life. Of course you can always turn this feature off in situations where you need to charge it to 100%.
