

Ransomware Protection is a useful feature that comes with Windows 11 to help secure users' devices against Ransomware attacks. However, by default, this ransomware protection is disabled on all Microsoft devices. Let's discover how to enable this feature in security settings through the following article!
How does a Ransomware attack happen?

To understand the importance of turning on Ransomware Protection on your computer, you must first understand how ransomware attacks work. These attacks target your important data – documents, photos and videos – encrypting them and making them inaccessible. The cybercriminals then demand a ransom in exchange for the decryption key.
The attack is quick, meaning that once your computer is infected, it will immediately reboot (or take you to the desktop) and you will see all your files have been encrypted. A single text file will appear, containing instructions on how to contact the cybercriminals responsible for the attack. Although this is a typical pattern, the attack can also manifest in other forms.
This forces you to pay the ransom in hopes of regaining access to their data. However, in some cases, you may not receive the decryption key even after payment.
Why should Ransomware Protection be enabled on Windows?
Ransomware can get into your device in many ways. You could click on malicious links while browsing, connect to an external hard drive infected with ransomware, or accidentally download a malicious app or compromised file from the web. Enabling Ransomware Protection will protect your data even if you accidentally make such mistakes.
The Controlled Folder Access feature prevents unknown or suspicious applications from modifying protected folders, even if you accidentally install untrusted software. Since files encrypted with ransomware are nearly impossible to decrypt without paying a ransom, enabling this feature helps you avoid the financial burden of having to pay scammers.
Unlike third-party antivirus and security programs that often only include Ransomware Protection in their expensive premium plans, Windows Security offers this feature for free. This feature allows you to protect your system from ransomware attacks without having to invest in premium third-party software, saving you monthly costs.
Windows also continuously monitors your system for suspicious activity and stops potential ransomware attacks in real time. This proactive defense not only improves confidence in your system's security, it also gives you peace of mind, allowing you to work and browse the web without constantly worrying about cyberattacks.
Finally, always turn on Ransomware Protection because you never know when you will become a victim.
How to enable Ransomware Protection in Windows 11
Before making these changes, make sure you are using an admin account. Guest accounts do not have access to this feature.
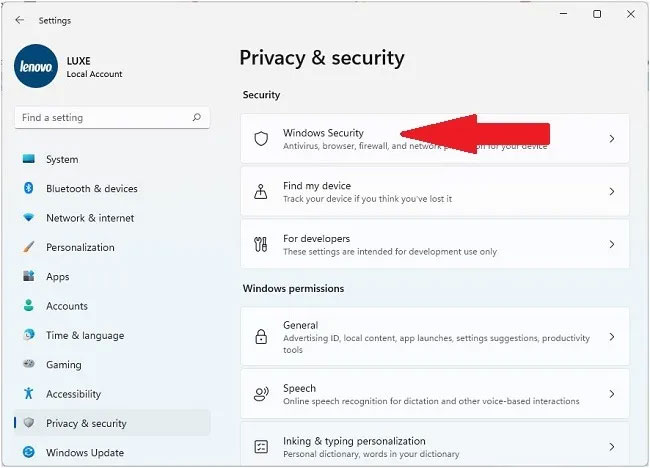
1. Click the button Win and scroll down the menu Start to find tabs Settings. Click on it to open the Settings menu.
Another way is to look for the symbol Settings on pinned items or use the search bar to find it “Settings”.
3. When tab Settings launch, select Privacy & Security.

4. Find the menu Windows Security.
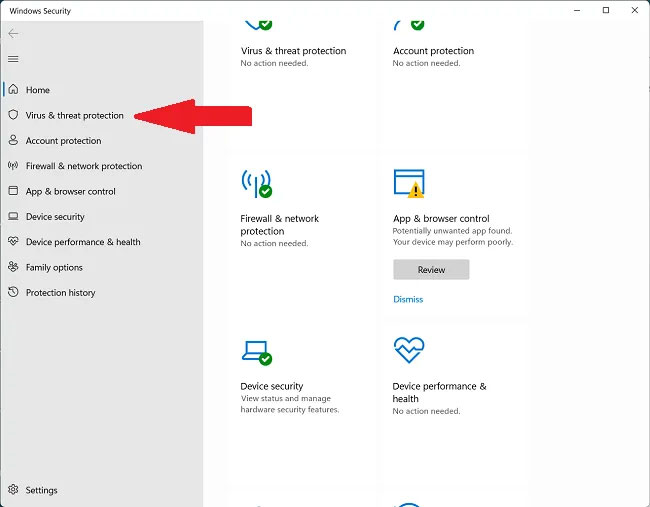
5. Click the button Open Windows Security to access ransomware settings.

6. A new window will open. Here, click on the menu item Virus & Threat, Protection and scroll down to find options Ransomware Protection.
7. Click Manage Ransomware Protection to get a list of ransomware-related options.
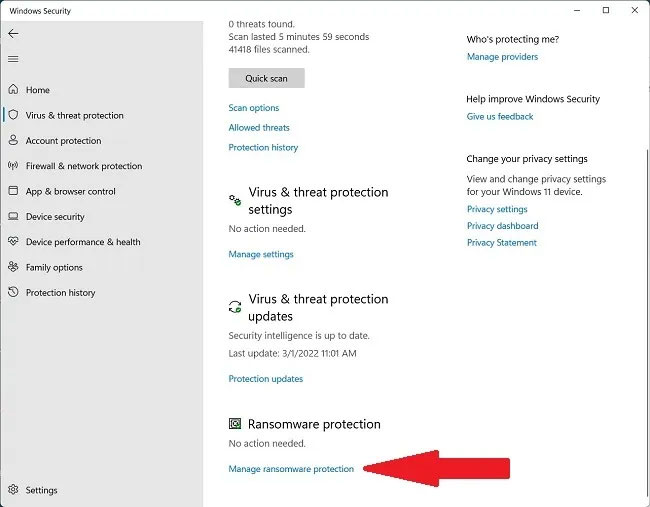
8. Find options Controlled Folder Access in the right pane.
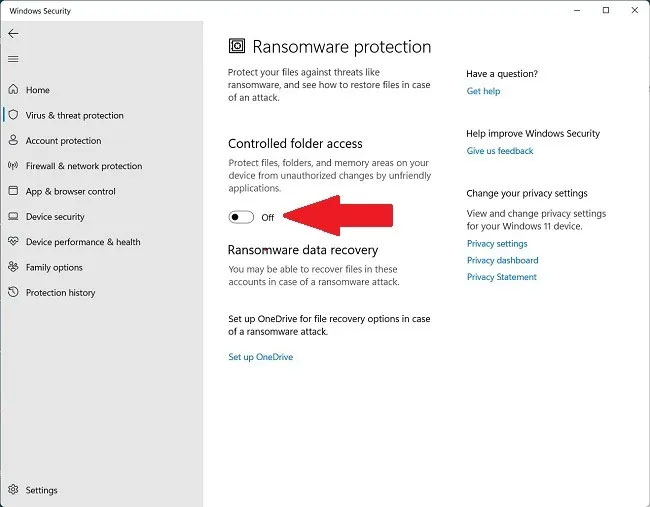
9. Toggle the switch to activate the feature.
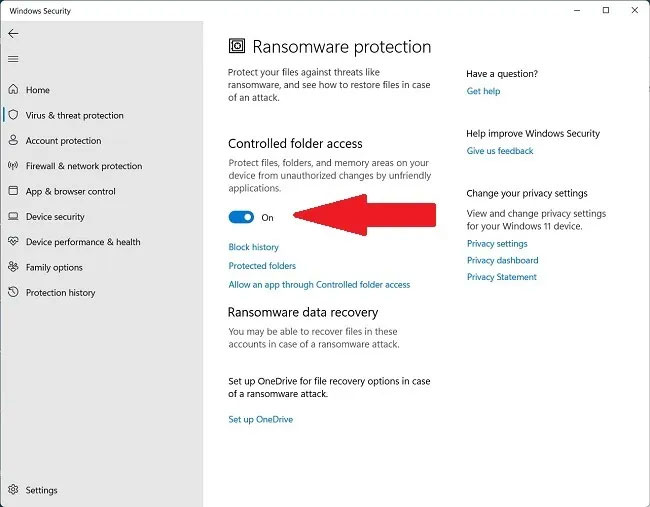
Ransomware Protection feature is now enabled. Here you can also add (whitelist) program folders that may give incorrect warning results in protected folders.
How to use your PC with Ransomware Protection enabled
Once the Ransomware Protection feature is enabled, you will have to whitelist some of your favorite programs so they get controlled folder access. These steps will help you avoid false positives and allow installation of new programs:
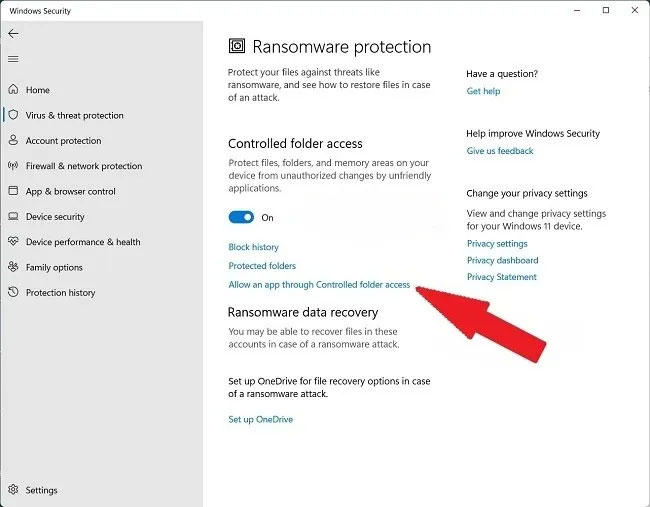
1. Click Allow an app through Controlled folder access in the window Controlled Folder Access.
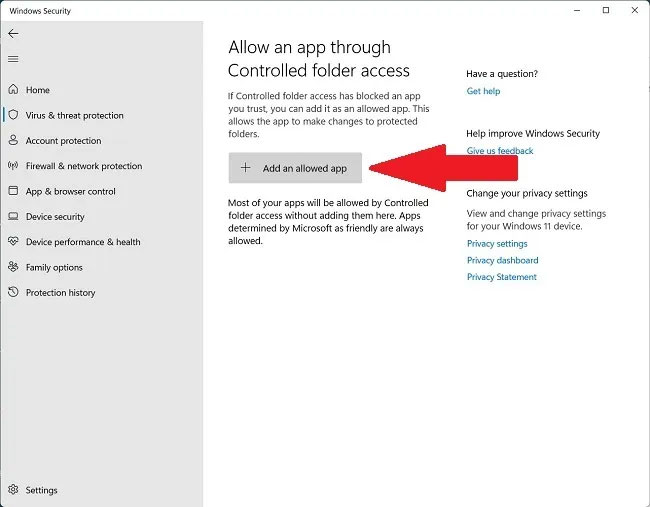
2. Click Add an allowed app.
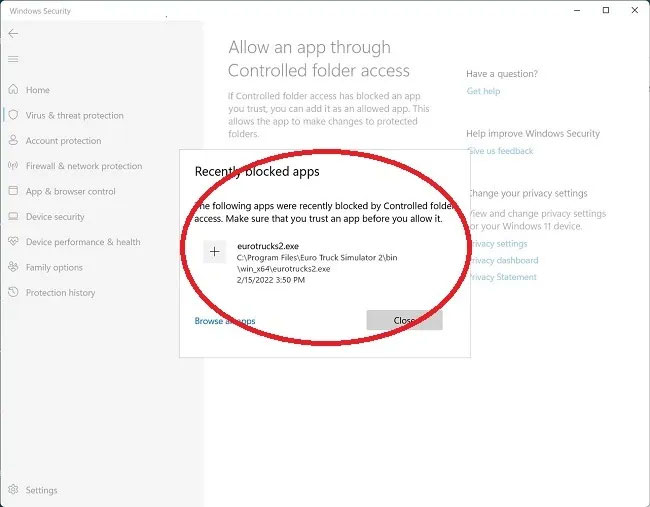
3. Select Browse all apps or Recently blocked apps to see if Windows Security (formerly known as Windows Defender) has been archived or blocked.
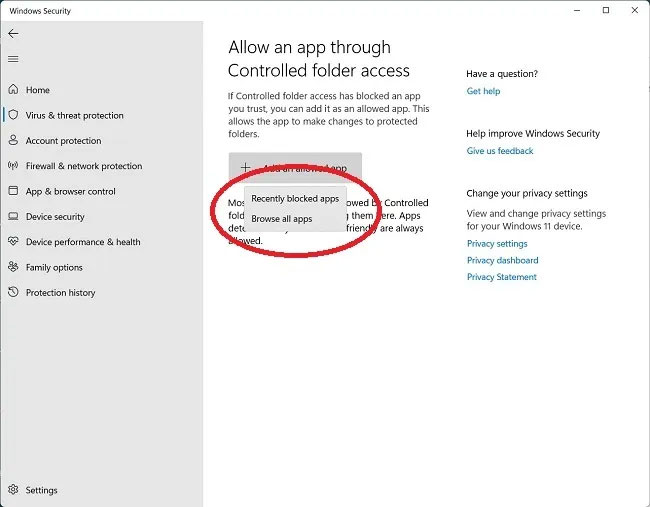
4. Select Browse all apps will open a pop-up window allowing you to select all executable files with the .exe extension.
5. In Recently Blocked Appsyou can remove harmful or unwanted applications or restore those you want to keep.
To avoid mistakenly flagging useful software or applications as ransomware, add them to the section Protected Folders.
