

You can see many different time zones quickly on the Windows 11 Taskbar. Users will choose the time zone you want to see to display at the same time on the system tray as you like. Here are more instructions for the time zone to Windows 11 Taskbar.
Guide more watches to Windows 11
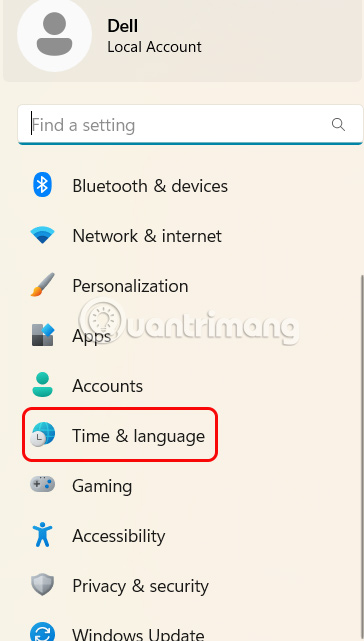
Step 1:
You press the key combination Windows + I To open Settings on the computer. Then we click on Section Time and Language To open the time management section on the computer.
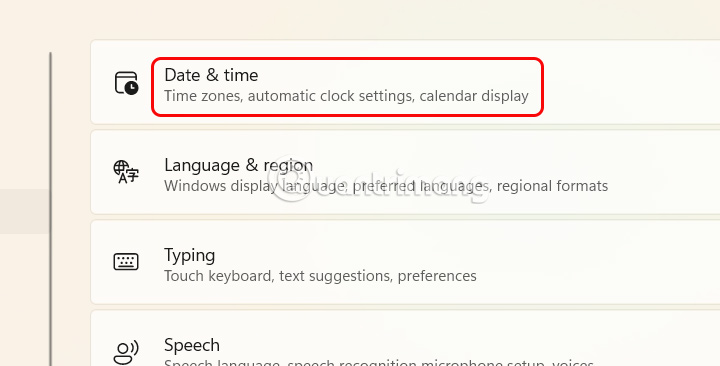
Step 2:
Switch to a new interface, you look at the next content and click Date and Time.
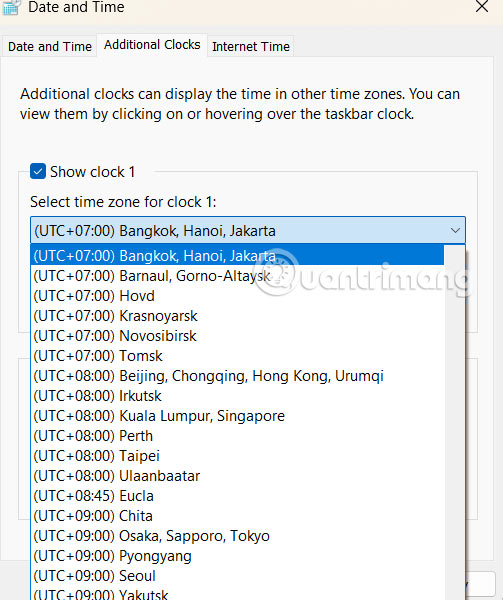
In the new interface, the user pulled down below and clicked Additional Clocks To add clocks to the computer.

Step 3:
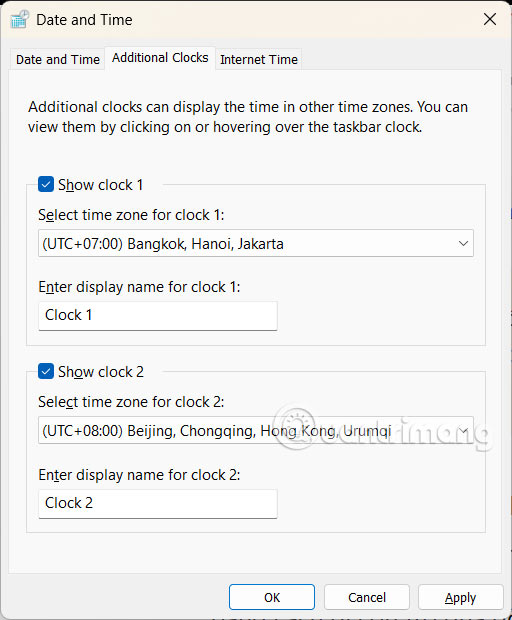
Now you will see an additional interface for your computer. We Choose the show clock 1 Already Select the time zone for the clock. You should Name the clock For ease of distinction.
Continue to add the second clock and also choose the time zone, name this clock. Finally click Apply and OK to save.
Step 4:
Click on the Taskbar and will see the clock added to the computer.
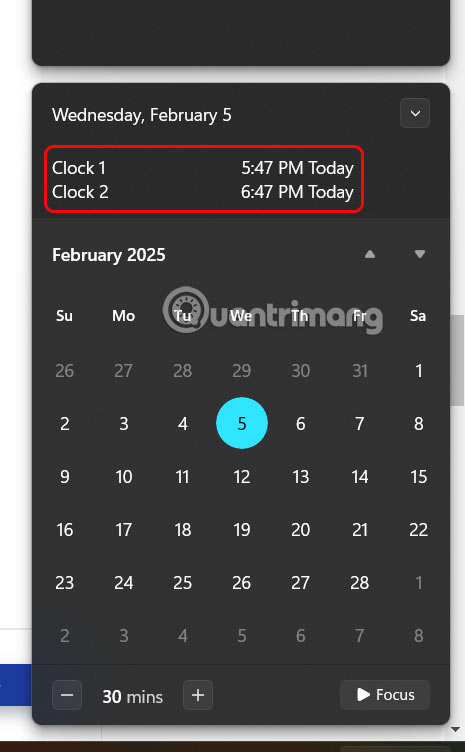
You can add a maximum of three different time zones to the Windows 11 taskbar at the same time. You can delete the additional time zone from the task bar at any time by opening the Date and Time page and uncheck the watch you want to turn off.
