

To create different Headers and Footers in Word, users need to break the Word document pages and separate the pages that want to create different Headers and Footers so that the parts are not related to each other. We can change the title between each page in Word or even change the title between pages with page numbering in Word symmetrically according to document format. Below are instructions for creating different Headers and Footers in Word.
Create different Headers and Footers on Word 2019 and above
Step 1:
First of all, we need to create page breaks between the sections we want to create different Headers and Footers.
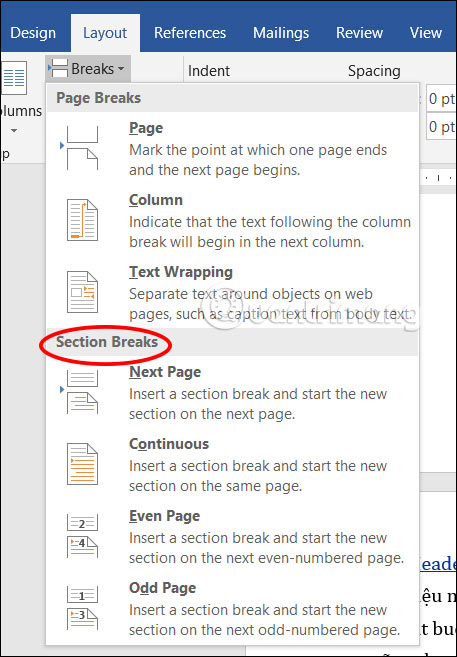
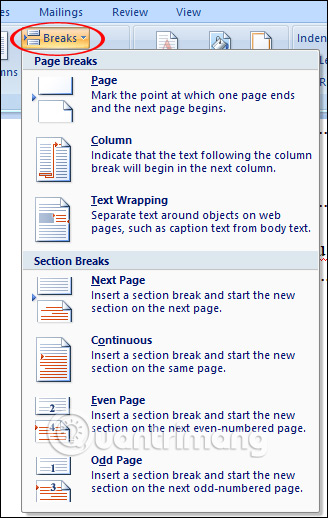
Open the Word document then Click at the top of the page to start a new section. Next click Layout tab and then select Breaks under. You will now see different page break options at Section Breaks.
- Next Page: Starts a new section on the next page, dividing the main parts of the document, for example, between chapters.
- Continuous: Starts a new section on the same page, changing page formatting elements.
- Even Page: Start a new section on the next even-numbered page, format for printing or book-style Word symmetrical page numbering.
- Odd Page: Start a new section on the next odd-numbered page.
You choose Next Page or Continuous to break the page, for example in the tutorial choose Continuous.
Step 2:
Next we need to unlink the header and footer from the two separate parts.
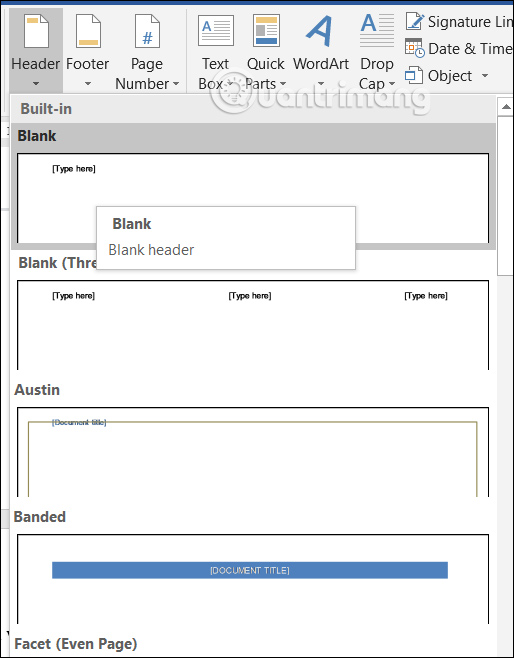
Click the header or footer area in the new section you broke. Next you Click Insert Already Select the footer style or then the page you want to insert as required.
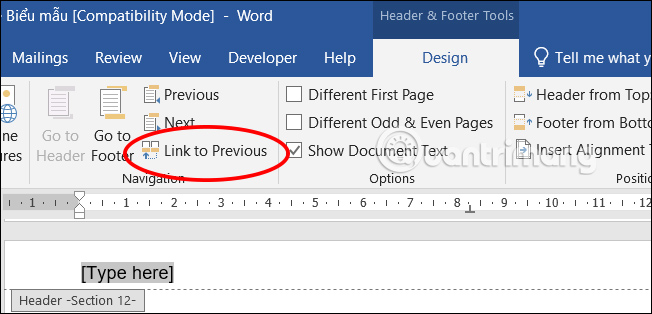
Afterward Click on Link to Previous to turn off the gray color.
Step 3:
Now you just need Enter content for Header or Footer for each section which I have separated.
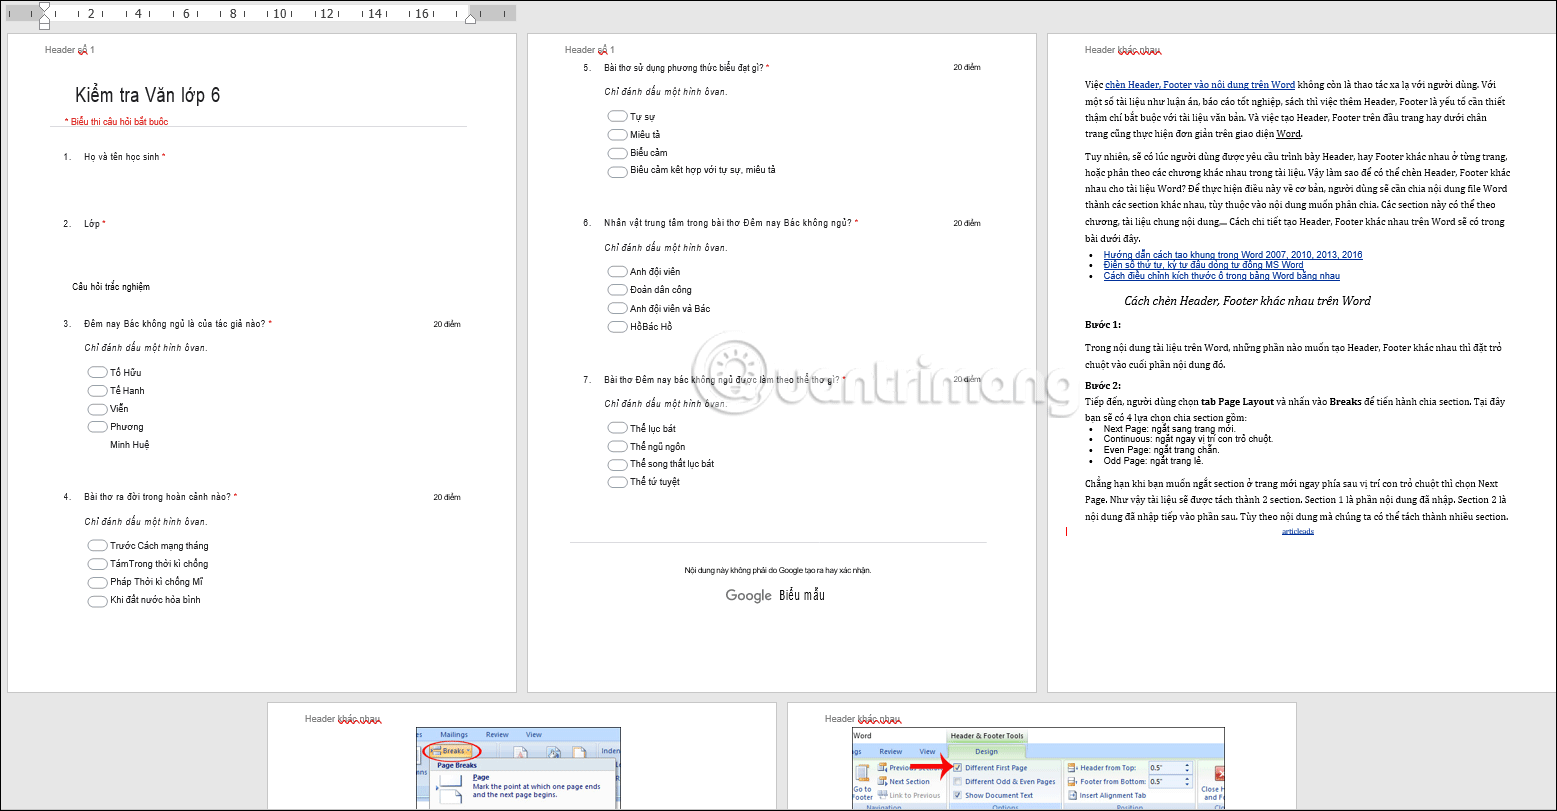
As a result, we will see that the first 2 pages have the same Header, starting from the 3rd page and subsequent pages of the same section have the same Header.
How to insert different Header and Footer in Word 2007
Step 1:
In the content of a Word document, for sections that want to create different Headers and Footers, place the mouse pointer at the end of that content section.
Step 2:
Next, the user selects Page Layout tab and click Breaks to proceed with sectioning. Here you will have 4 section division options including:
- Next Page: breaks to a new page.
- Continuous: immediately interrupts the mouse cursor position.
- Even Page: breaks even pages.
- Odd Page: odd page break.
For example, when you want to break the section on a new page right behind the mouse cursor position, select Next Page. Thus the document will be separated into 2 sections. Section 1 is the imported content. Section 2 is the content entered into the next section. Depending on the content, we can separate it into many sections.
Step 3:
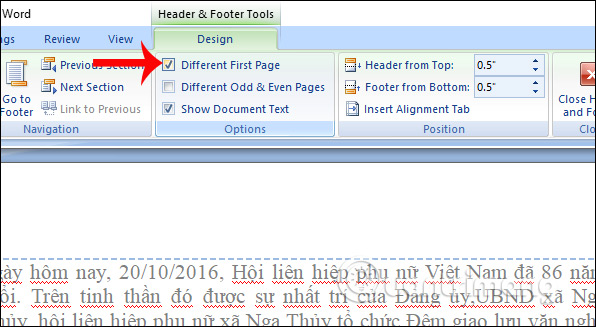
Next, create Header and Footer for each section. Double click on the Header at the top of any page in section 1. Next Design section of Header & Footer Tools everyone bookmarked Check the Different First Page section in the Options section, then enter the content for the Header of section 1 as desired.
Step 4:
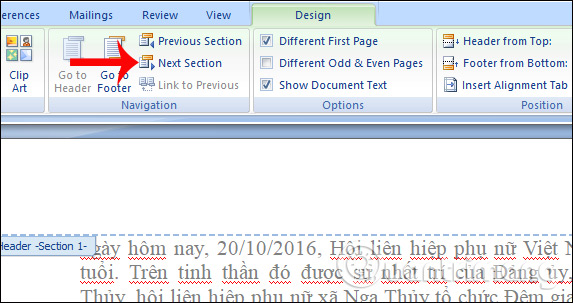
After writing content for the Header of section 1, click Next to switch to Header of section 2.
Step 5:
Finally click select Link to Previous so that Header section 2 is unrelated to the Header of section 1, then enter the content for Header 2 of section 2. Just double-click anywhere outside the Header to complete.
When creating a Footer, users do the same as when doing the Header using the operations above.

Above is how to create different Headers and Footers on Word in a simple and quick way. Instead of using the same Header or Footer, we can change and use Header or Footer on different pages or chapters. This can help make your document more lively.
Wishing you success!
