

Sometimes DHCP cannot get a valid IP address from the network interface card, it will appear the error message “Ethernet doesn't have a valid IP configuration”. This error limits users' access to the Internet and receives error messages such as Limited Connectivity or No internet access. If you are experiencing the same problem, read this article to learn how to fix the error.
On each computer, dynamic IP configuration is enabled by default. Therefore, users do not need to install it manually to connect to the network with DHCP Server. However, sometimes DHCP cannot get a valid IP address, leading to the above error. Below are some ways to help you fix the error “Ethernet doesn't have a valid IP configuration”.
1. Do some preliminary checks
Start troubleshooting by performing some basic checks. First, restart your computer. Then, disconnect the Ethernet cable from the computer and router and reconnect it. Make sure that the Ethernet cable is not damaged. Additionally, connect Ethernet cables to different ports on your router and computer to eliminate any port issues. Then, reboot the router (or reset it).
If these basic checks don't identify the root cause of the error, you can proceed to apply the remaining fixes listed below.
2. Discharge static electricity
The presence of static electricity on your computer can cause unforeseen errors. It can also affect your Ethernet connection. So, discharge the static electricity to eliminate this possibility. To do so, turn off your computer, disconnect any peripherals, and remove the power cable. Then, hold the power button for 15-20 seconds to discharge static electricity.
Then, reconnect the power cable and restart your PC. Run the troubleshooter again and if the error persists, apply the next fix.
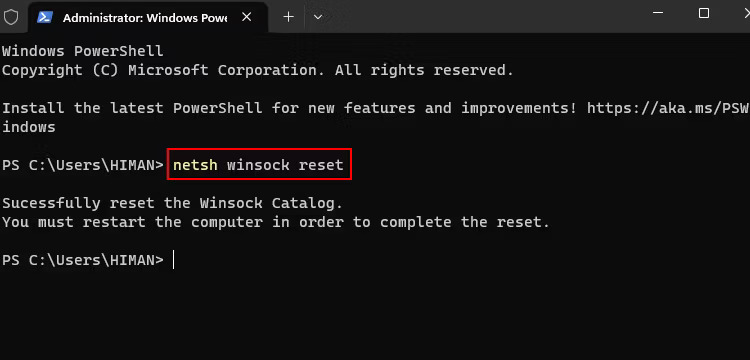
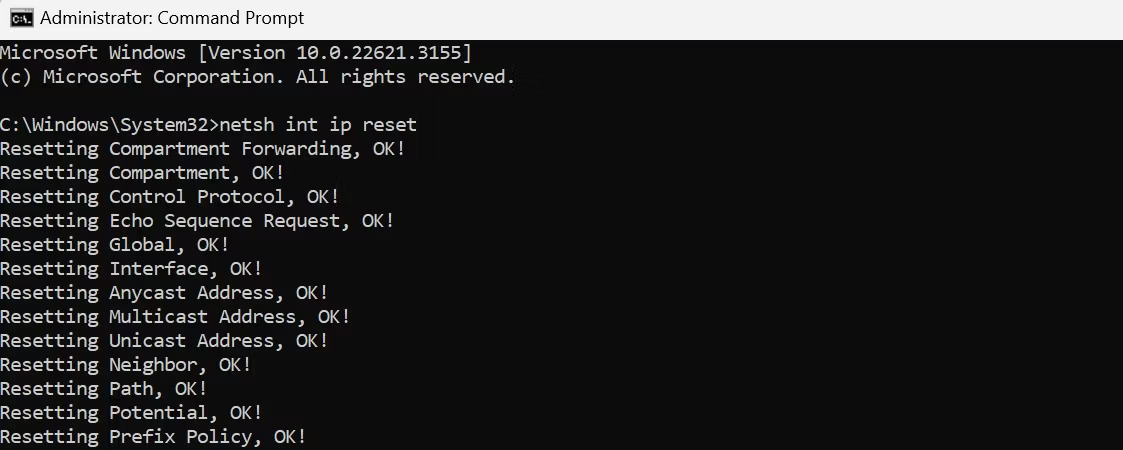
3. Reset TCP/IP Stack and Winsock Catalog
Winsock is an API used by network applications to access network services such as TCP/IP and it stores its information in a database called Winsock Catalog. Resetting the TCP/IP Stack and Winsock Catalog often resolves network-related problems. To perform this reset through Command Prompt, you can follow these steps:
1. Open Windows Search and type “Command Prompt”.
2. Right click Command Prompt and choose Run as administrator.
3. To reset Winsock Catalog, enter “netsh winsock reset” and press Enter. Allow Windows to reset it; You will see the message “Successfully reset the Winsock Catalog” or “Winsock reset completed successfully” after the process is complete.
4. To reset the TCP/IP Stack, enter “netsh int ip reset” and press Enter. Wait for the process to complete, then restart your computer to apply these changes.
4. Configure IPv4 to automatically obtain an IP address
If you have configured your IP address manually, consider setting up your router or other access point to automatically assign it. To do this, follow these steps: Right-click the Start button and select Settings. Then navigate to Network & internet in the left sidebar and open settings Ethernet.
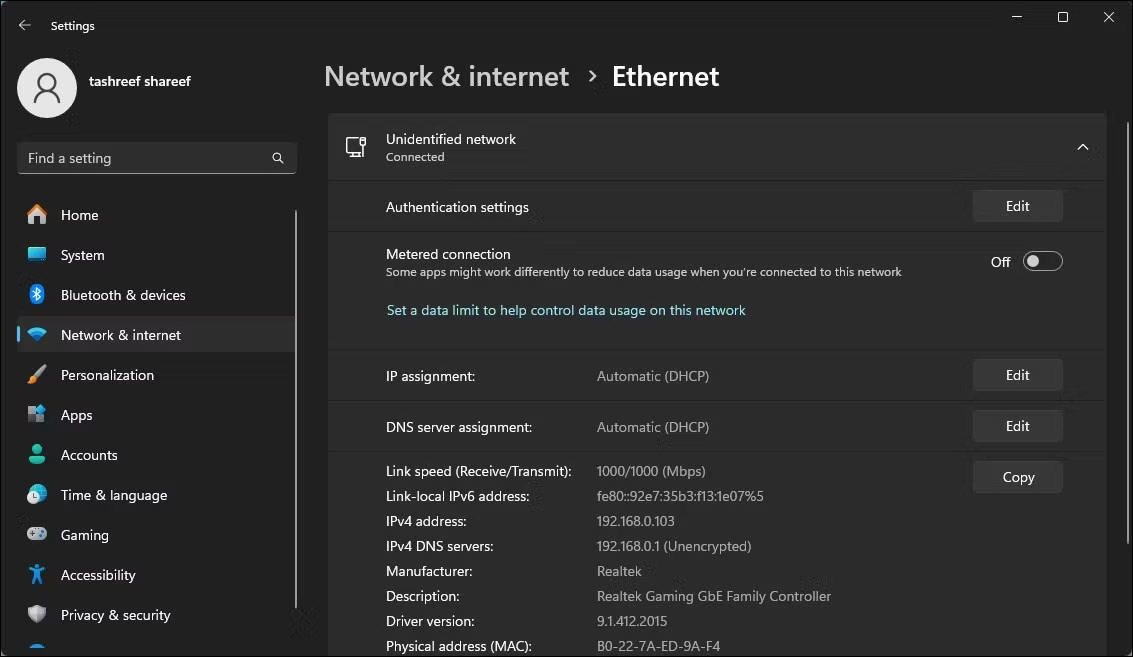
In network properties, click the button Edit next to IP assignment and choose Automatic (DHCP) from the drop-down menu. Finally press Save to apply changes.
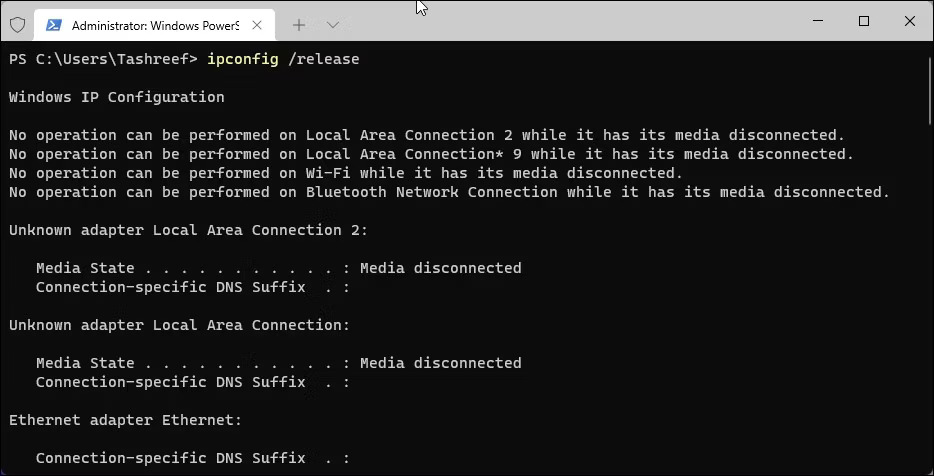
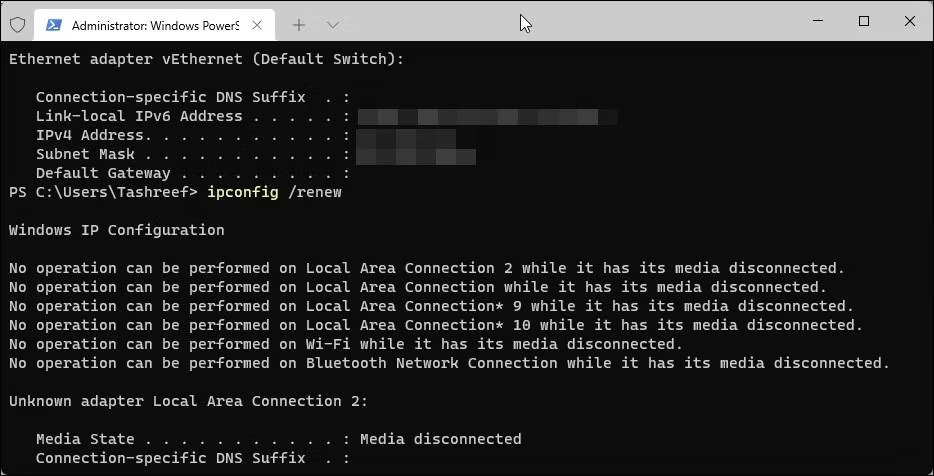
5. Release and renew your IP address
Refreshing your Internet connection by releasing and renewing your IP address can resolve IP conflicts and other network problems. Freeing your IP address will release it from the router, while renewing will assign your device the same or different IP address, which resolves most errors related to IP address.
To release and renew your IP address, follow these steps:
1. Open Command Prompt with admin rights.
2. Enter “ipconfig/release” and press Enter. This will disconnect your device from the Internet.
3. Then type “ipconfig /renew” and press Enter. This will reconnect you to the Internet.
6. Clear DNS cache
Clearing DNS removes DNS records from your cache and prompts your device to retrieve information from DNS again. This usually resolves network related issues. To clear DNS cache on your Windows PC, open the Command Prompt application with admin rights, enter the following command and press Enter:
ipconfig /flushdns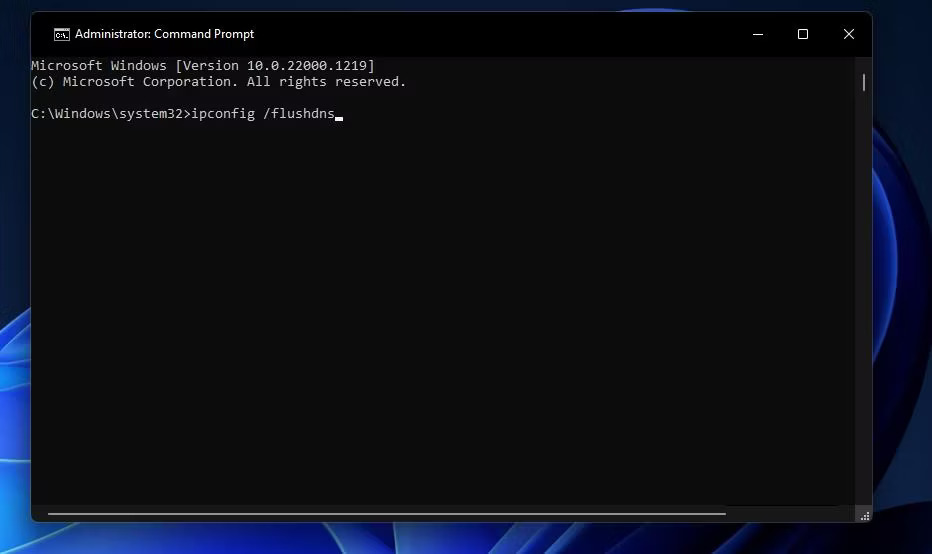
Once you have cleared the DNS cache, restart your computer. Then run the troubleshooter if the Ethernet connection still doesn't work. If the problem persists, proceed to apply the next fix.
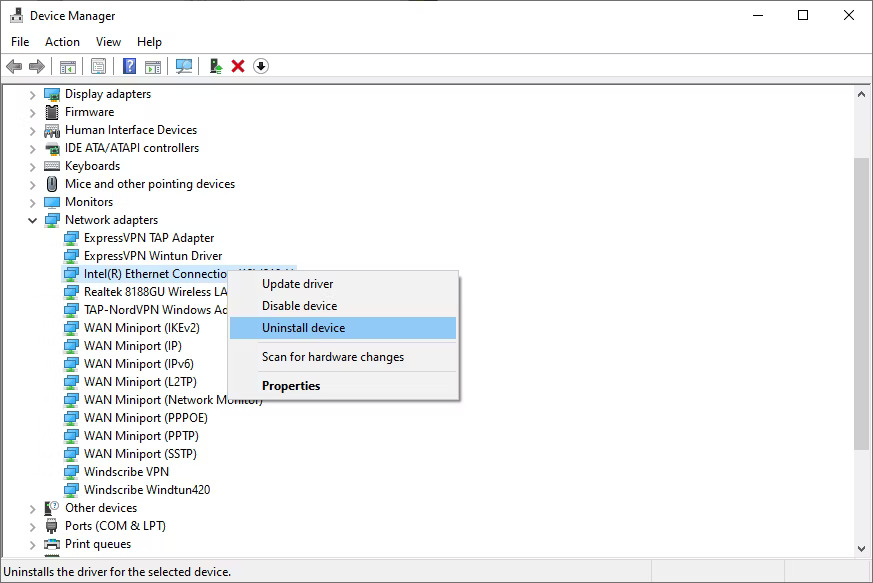
7. Reinstall the Ethernet driver
Corrupt ethernet drivers can also cause errors. To eliminate this possibility, uninstall and reinstall the Ethernet driver from scratch. Before doing that, make sure you have a copy of the Ethernet driver. If you don't have one, you can connect your PC to WiFi to download or download to another device and transfer it to your PC via USB.
Once you have the driver file, follow these steps:
- Right click on the Start button and select Device Manager.
- Then expand the category Network adapters.
- Right click on the Ethernet driver file and select Uninstall device.
Then, run the driver file you downloaded earlier and follow the on-screen instructions to install it. If the problem persists after reinstalling the driver, turn off the proxy server.
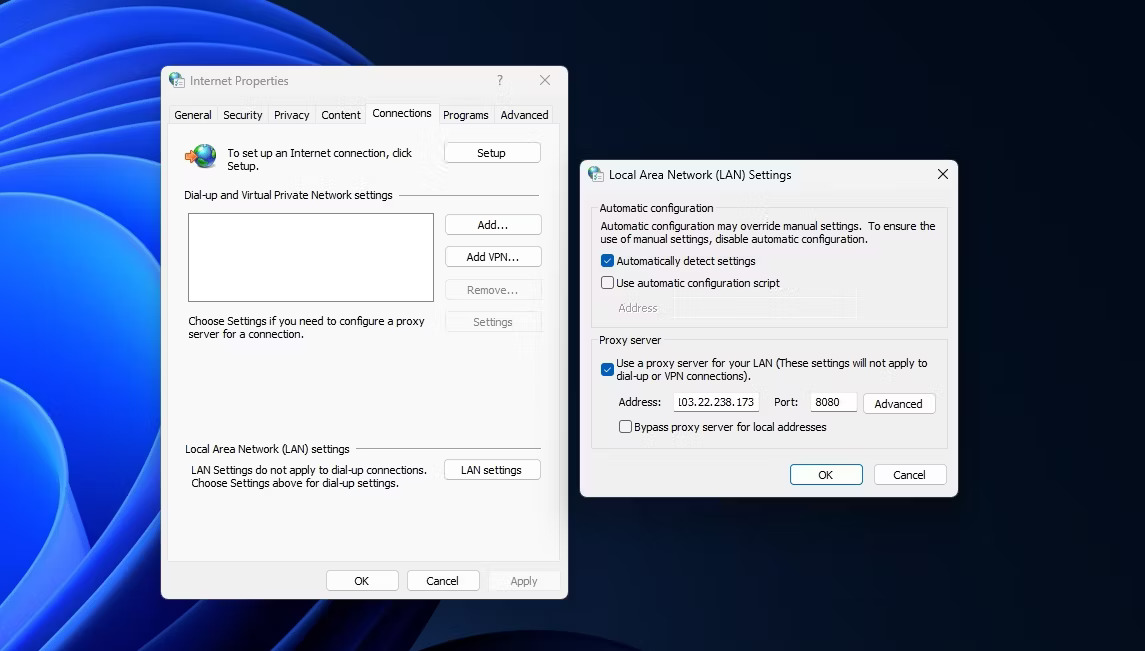
8. Disable Proxy Server over LAN
Configuring a Proxy Server over a LAN may hinder the router's ability to assign IP addresses to PCs. So, make sure that Proxy Server is not enabled and disable it if it is currently enabled. To do so, follow these steps:
- Enter “Internet Options” into the Windows search bar and open it.
- Then, navigate to the tab Connections and click the button LAN settings.
- If the box is next to Use a proxy server for your LAN is selected, uncheck this box to disable the proxy server.
- Finally, click Apply > OK to apply the changes you made.
9. Temporarily disable anti-virus features
Interference from Windows Defender or third-party antivirus software may cause the error in question. To rule out this possibility, temporarily disable your security suite. Temporarily turn off Windows Security on Windows 11 or Windows 10. If you use third-party antivirus software, turn it off or temporarily uninstall it.
If turning off antivirus protection does not resolve the problem, your last option is to contact your Internet service provider (ISP).
If you cannot determine the root cause of the problem despite applying the above fixes, there may be a hardware issue with the router that you cannot resolve independently. Therefore, contact a representative from your Internet Service Provider (ISP) and ask for their assistance in further investigating the issue.
Above are the best methods to fix Ethernet doesn't have a valid IP Configuration error.
Wishing you success!
