

Most Windows errors occur after you log into your computer. However, the error “User Profile Service Failed The Logon” does not allow you to log in, which is why solving this error is harder than other Windows errors.
The error “user Profile Service Failed The Logon” occurs due to the failed ntuser.dat file, the Registry or the core system file is broken or the user profile service is improperly configured. However, you can use the following steps to effectively diagnose and fix the problem.
Activate the integrated admin account with Windows Recovery Environment
The first thing you should do is to activate the integrated admin account if you cannot log in with your account. All other corrections will not be possible without this hidden account.
There are many ways to activate the integrated admin account in Windows, but the traditional methods will not work here. Therefore, we will use Windows Recovery Environment (Winre) to open a version of Command Prompt and modify the Registry to activate the account.
Warning: Before continuing the steps mentioned below, please back up the system of the system Export In the Registry Editor, if possible.
Follow these steps to activate the admin account:
1. Click on the icon Source.
2. Keep the key Shift and click on the option Restart.
3. After your PC restarts, click Continue.
4. Select Troubleshoot.
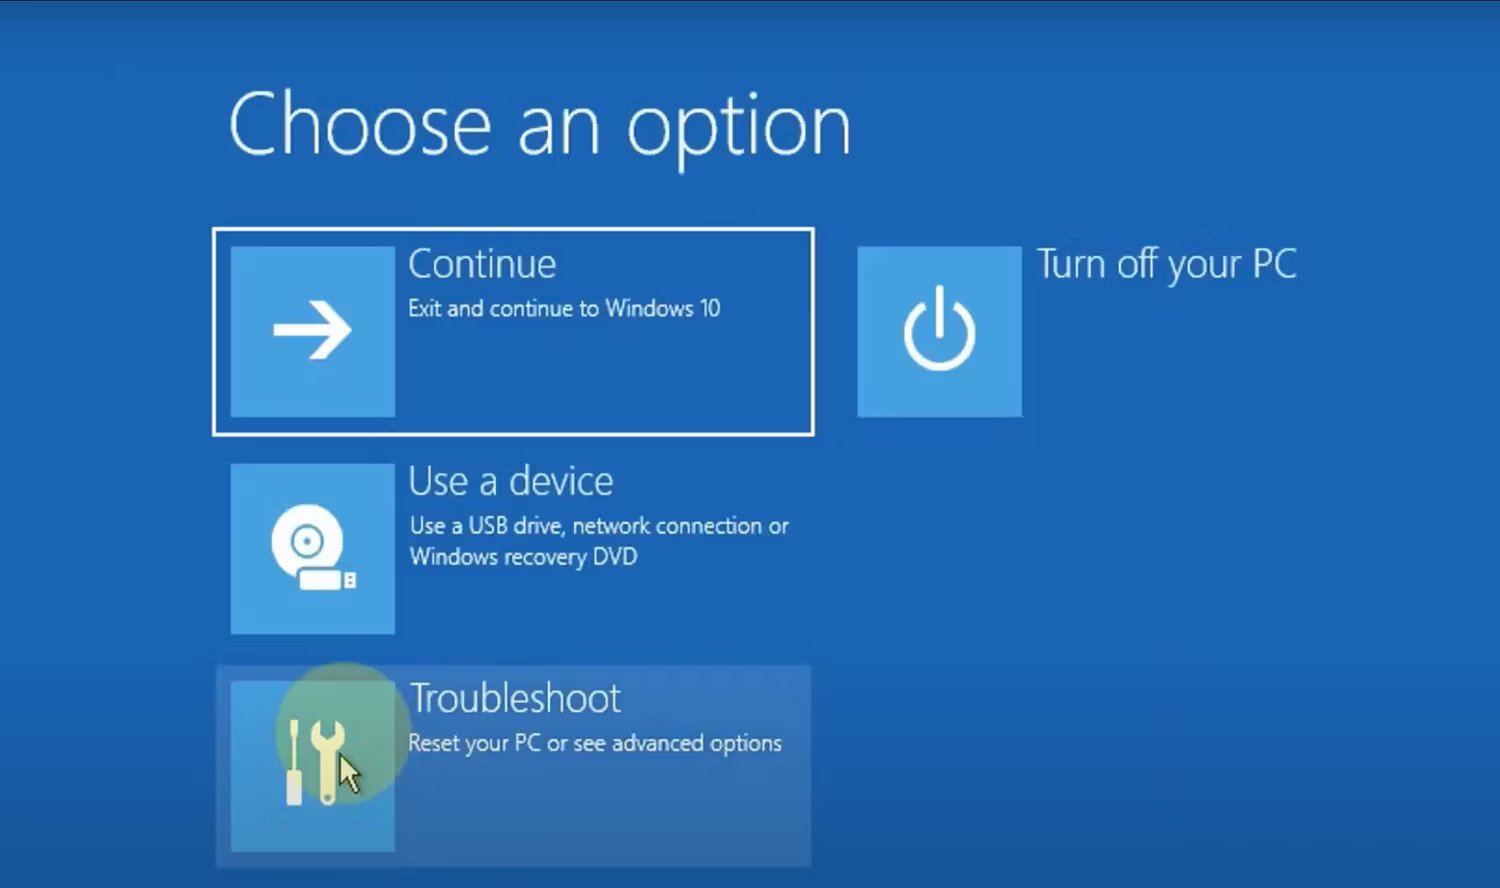
5. Click on Advanced Options> Command Prompt.
6. Type Regedit Go to the Command Prompt window and press Enter.
7. Click on the key Hkey_local_machine On the left.
8. Click on File> Load Hive.
9. Select the option This PC.
10. Click on Windows> System 32> Config.
11. Find the file Sam and double click on it.
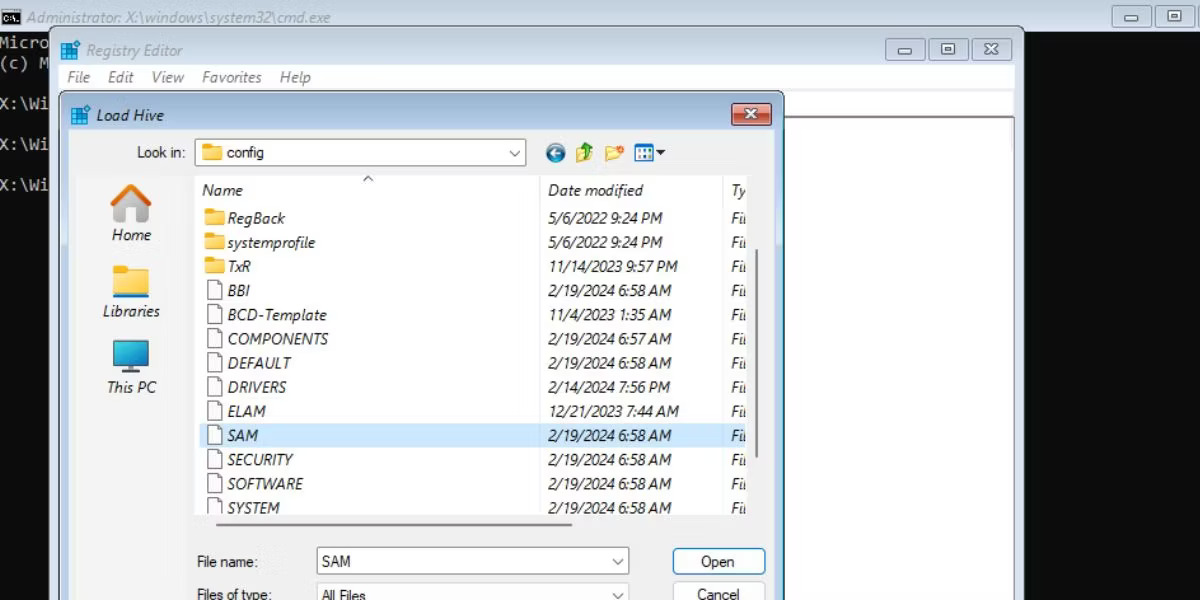
12. Name the key is Rem_sam and click OK.
13. Navigation towards the following Registry Key:
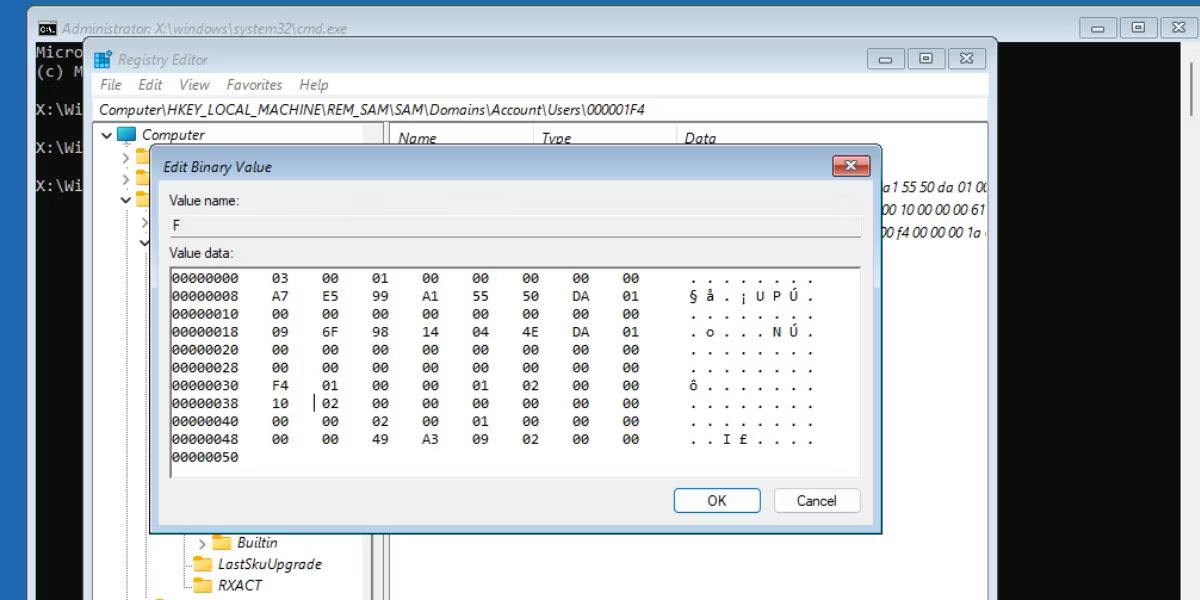
HKEY_LOCAL_MACHINE\REM_SAM\SAM\Domains\Account\Users\000001F414. Double click on binary value F.
15. Go to the item 00000038 In the first row.
16. Modify value 11 In the second column of the row 00000038 wall 10.
17. Click on OK.
18. Escape from the Registry editing window.
19. Close Command Prompt.
20. Click on Continue To boot into the lock screen. You will see an additional admin account on the lock screen.
Start in Safe Mode
After activating the integrated admin account, the first thing you should do is to start Windows into Safe Mode. Basically, Safe Mode starts Windows with the minimum features and programs needed to operate.
Replace ntuser.dat file
NTUSER.DAT file stores data on user accounts and if it is broken, you have to replace this file. Log in to the Admin account that you activated earlier. Then repeat the following steps:
1. Click Win + E To open the Explorer file.
2. Click on View> Hidden Items.
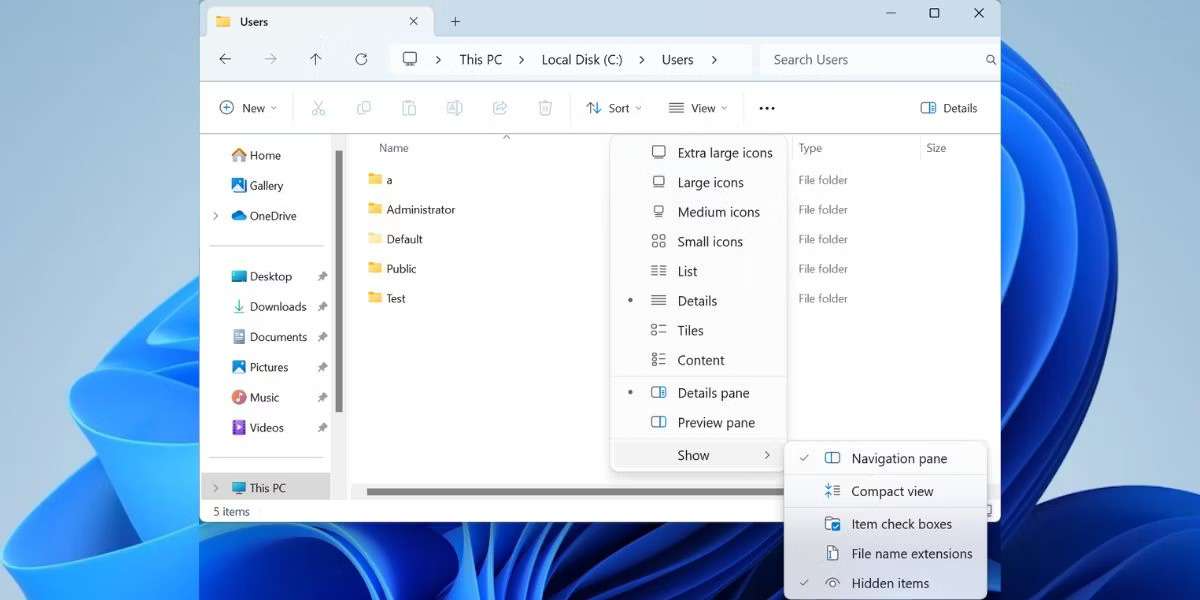
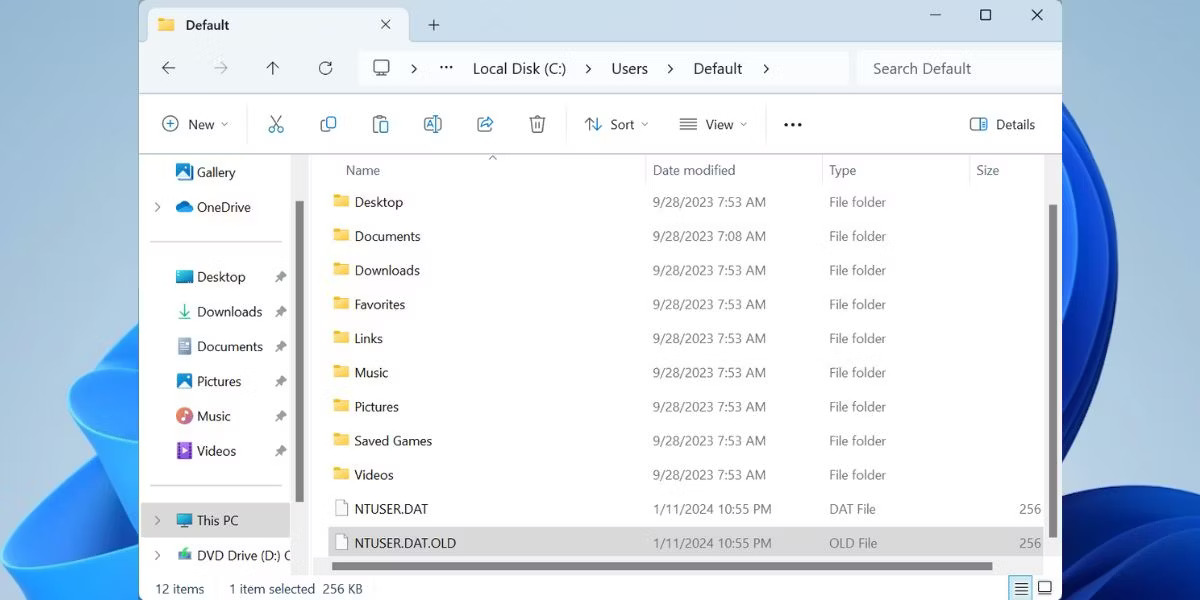
3. Open the folder Default. Click the file Ntuser.dat and rename to “Ntuser.dat.old”.
4. Click Backpace. Move to the folder Administrator and copy the ntuser.dat file.
5. Return to the folder Default And paste the copied file into it.
6. Restart your PC to apply changes.
The cause is most likely to cause the error “User Profile Service Failed The Logon” is due to the broken user file. This can happen for many different reasons, from sweeping anti -virus software when starting to sudden power outages when turning on the computer.
Fortunately, Windows has some built -in utilities that can help you automatically find and repair broken Windows files. Such utility is called System File Checker (SFC) and it is executed by Command Prompt.
Restoring the computer to the previous state
Windows has a useful feature called System Restore that allows you to recover changes to your computer and restore it to the previous time.
Before continuing, you should know that this feature is not on the default and you must create a recovery point manually unless you configure Windows to create a daily recovery point.
If you remember creating a recovery point before the error appears, follow these steps:
- Press the key Windows + R To launch the dialog box.
- In the box Trembletype rstrui.exe and press Enter.
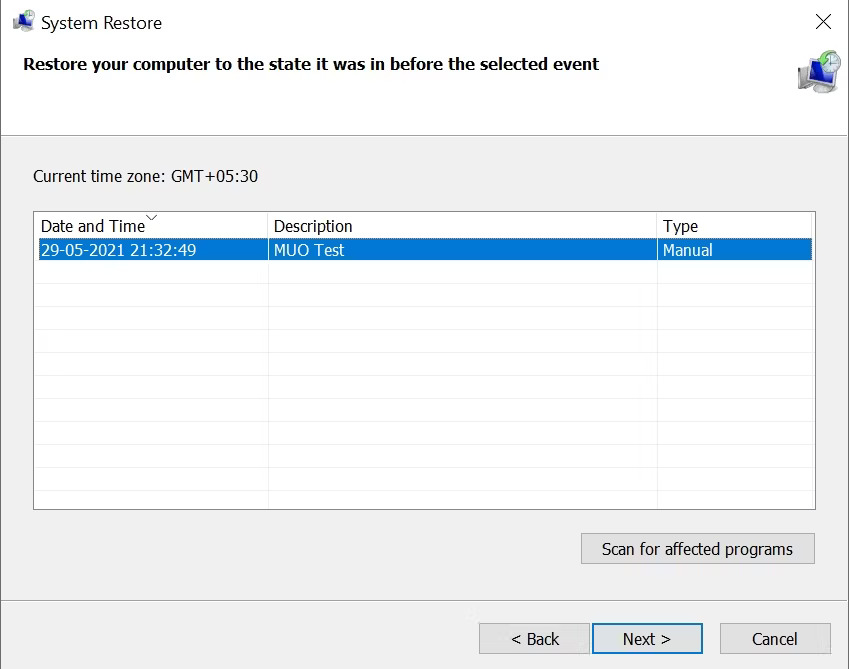
- On the System Restore dialog box, click Next.
- Select a recovery point from the list.
- On the next window, check everything carefully and click Finish.
- Windows will recover from the previous state and now you can log in without any trouble.
You should back up all important data or applications that they may have installed after creating a recovery point.
Change of Registry configuration
Another way to fix the error “User Profile Service Failed The Logon” is to make some changes to the Registry. This is a method of improving troubleshooting and you should create a system recovery point before continuing.
Do the following to configure the registry properly:
1. Start in Safe Mode by steps in the first part of this article.
2. Press the key Windows + R To open the tremor. Knock Regedit and press Enter.
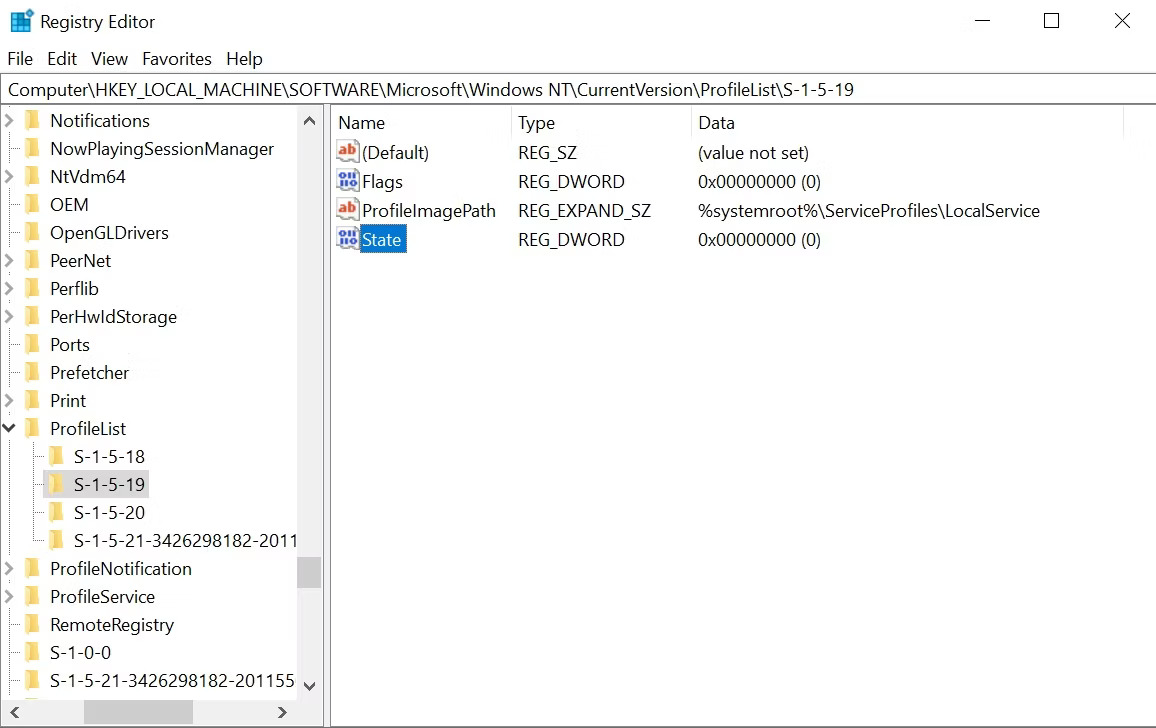
3. In the Registry Editor, use the navigation bar on the left, going to:
HKEY_LOCAL_MACHINE\Software\Microsoft\Windows NT\Current Version\Profile List4. Here, you will see two files with the same name, but a file will have a .Bak extension.
5. Right -click on the file with an extension .Bak and choose Rename. Delete .Bak extension but do not touch the file name and press Enter.
6. Now, right -click on the original file without .Bak extension and add .Bak at the end of the file.
7. In the folder containing the renamed file from step 5, right -click on Statethen choose Modify.
8. Change value in Value Data from 8000 wall 0 (Are not).
9. Then, right -click on the item Refcount and change the value in Value Data wall 0 (Are not).
10. Confirm the changes and close the Registry Editor.
11. Restart your computer and log in.
What will happen if you can't find the .Bak file in the Registry Editor?
This is unlikely, but your computer may not create a .Bak extended file. In this case, open Windows Explorer and visit:
C:\Users\Default\AppData\Local\Application DataIf you find another folder with the name Application Data In the folder you are using, delete it and restart your computer. It will fix the problem.
Activate User Profile Service
In certain cases, User Profile Service may be disabled. Usually, third party applications are the culprit. Fortunately, you can activate it by running a simple command in the Command Prompt window:
- Start your computer into Safe Mode.
- In the search bar Start, enter CMD. From search results, right click on Command Prompt > Run as administrator.
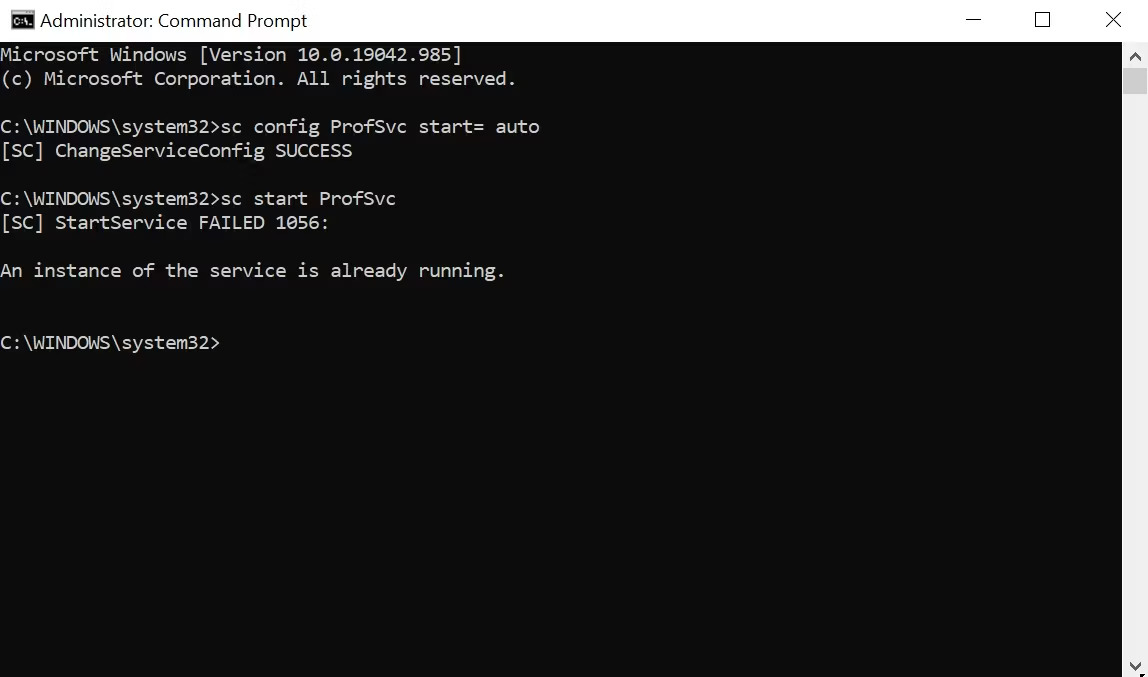
- In the Command Prompt window, type SC Config Profsvc Start = Auto and press Enter.
- Then type SC Start Profsvc and press Enter.
- Close Command Prompt and restart your computer.
Some of these methods are also helpful in diagnosing many other common Windows errors. Therefore, it would be helpful if you remember them when encountering other problems on your computer.
I wish you success!
Refer to some of the following articles:
