

When connecting two computers via TeamViewer, users can share and transfer files and other data, such as sharing audio on TeamViewer. With this audio sharing setup on TeamViewer, your partner can assist you in correcting audio errors on the computer if there is a problem hearing the audio clearly from the computer. Or you can simply share some interesting sounds with your partner. The article below will guide you to share audio on TeamViewer.
Instructions for sharing audio on TeamViewer
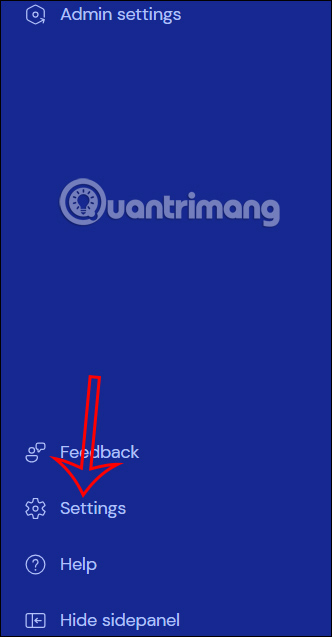
Step 1:
At the interface on TeamViewer, the user clicks Settings section on the left edge of the interface.
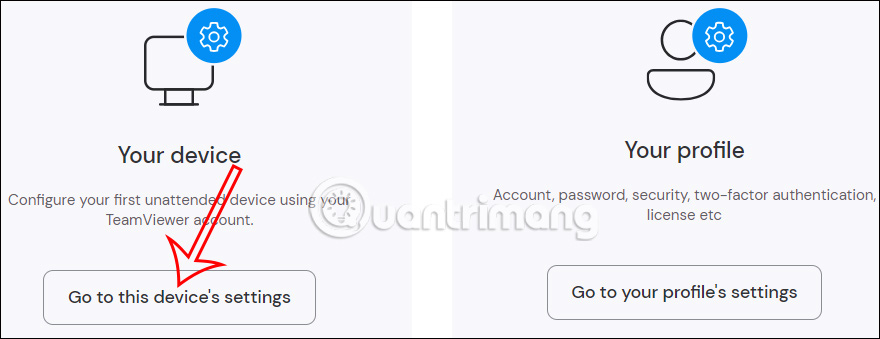
Next, display the new interface Click on Go to this device's settings to install on your computer.
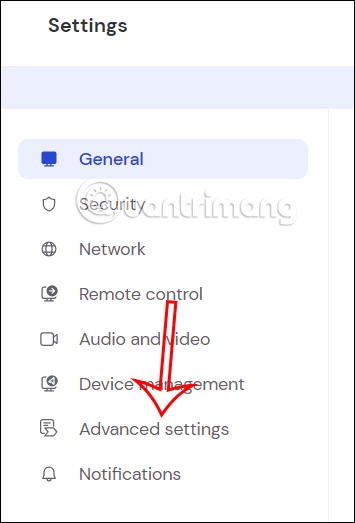
Step 2:
This time displays the interface with setup items for the device Click Advanced Settings to adjust.
Looking at the interface next to it, we click on it Open advanced settings.
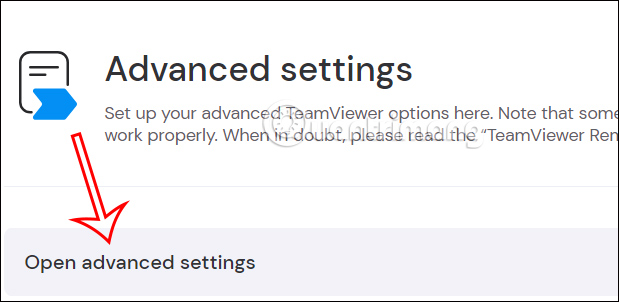
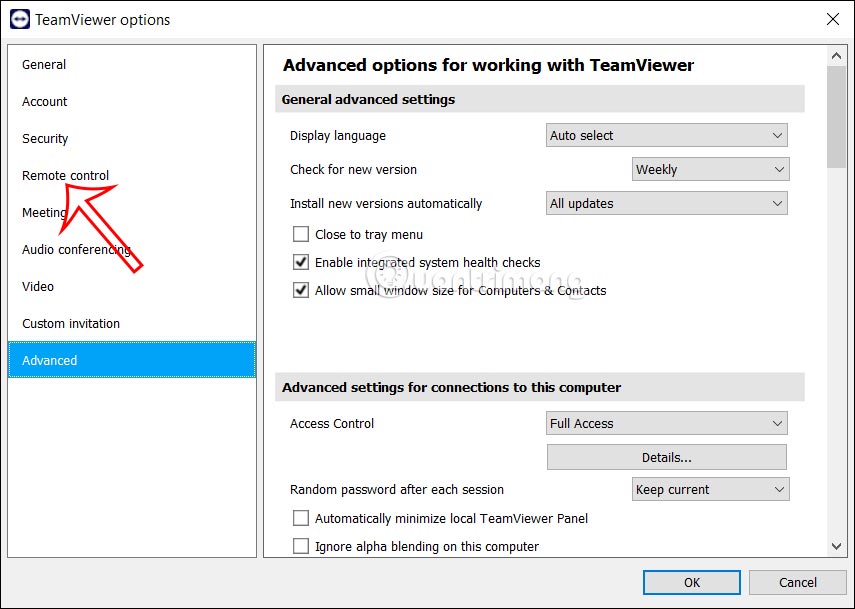
Step 3:
Immediately display the interface with advanced settings items, we click Remote control section.
Step 4:
Show the settings as shown, you just need Select Play computer sounds and music to display music and sounds on your computer when transferring data on TeamViewer.
Click OK to save this new setting.
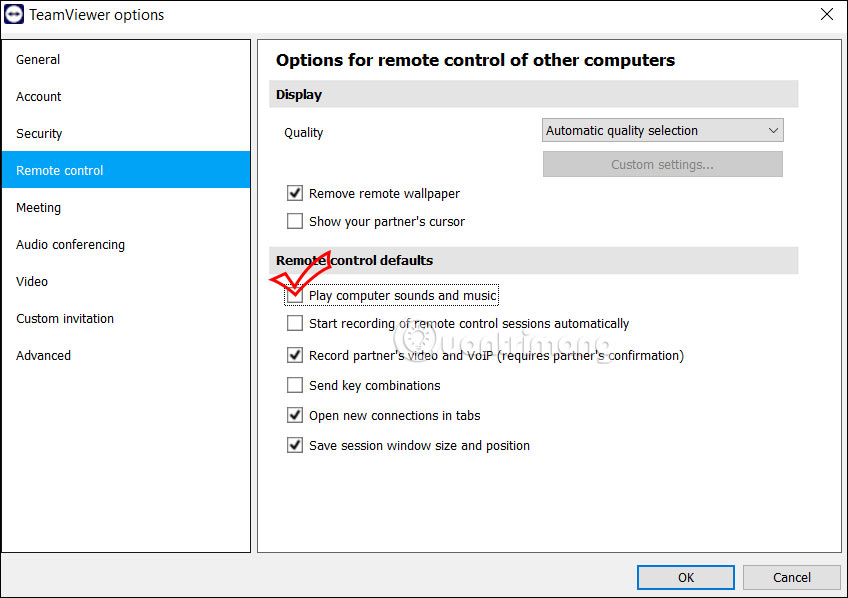
Note that both devices when connecting to each other will need to have sound and music turned on on the computer in TeamViewer to be able to share audio.
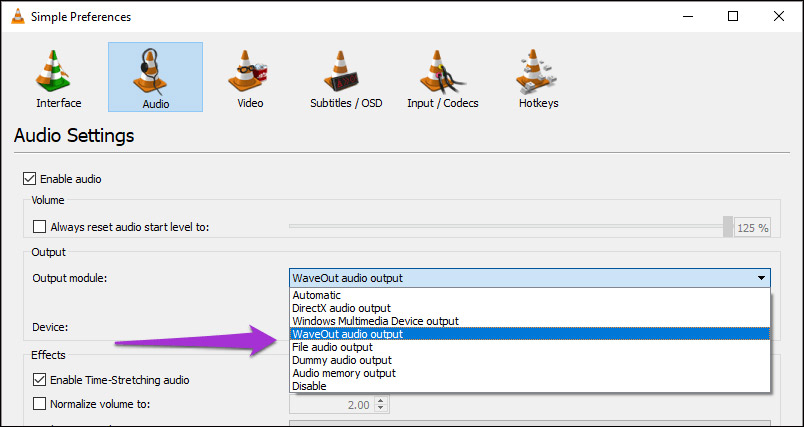
In case you Turn on the music or video player software on your computer And if you want to stream audio from that software, you need to review the audio settings from that software.
For example, with VLC software, click on Tools, select Preferences and then click on Audio to adjust. Now you need to select WaveOut audio output mode.
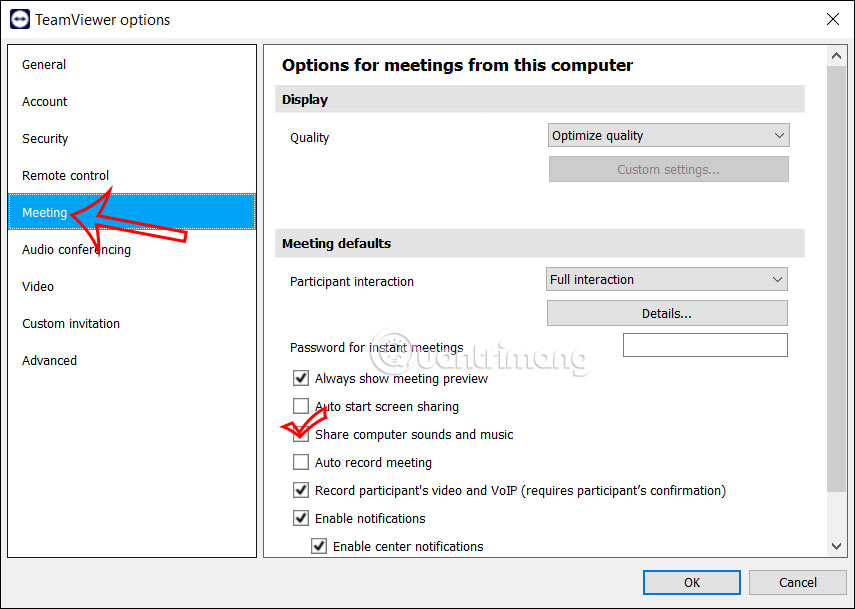
Step 5:
If Online meeting in TeamViewerthen click next Meeting section to adjust the sound during online meetings.
Then we Select Share computer sounds and sharing to share audio and music when meeting online on TeamViewer.
