

Basically, Windows SmartScreen is a tool and feature that checks the safety of a file or application that may be harmful on a Windows system. This feature has been integrated since Windows 8. When you run a file or an application of unknown origin, Windows will block this application and display a screen asking whether or not you should run this application.
It can be said that this feature is extremely useful, however, if many of these notifications appear when running the application, it will make many people feel uncomfortable. Therefore, you can proceed to disable Windows SmartScreen on Windows.
What is SmartScreen filter?
SmartScreen acts as an early warning system to let users know if a website or application is suspicious or if the downloaded file is not found in the list of safe software programs. Essentially, SmartScreen uses a large database of whitelisted and blacklisted websites to analyze whether a given thing is safe to open or not.
SmartScreen runs in the background on Windows and will usually show up as a large blue box indicating “Windows protects your PC” (Windows already protects your PC) by blocking a certain program or website. If it's a program, you'll usually have options “Run Anyway”. If SmartScreen appears on a website that you know is safe, you can click “More Information” and report it as a safe website.
Overall, SmartScreen is a useful layer of security that you should leave behind. However, it sometimes prevents you from visiting websites or downloading things that you know are safe, but have not been verified by SmartScreen. At times like these, you should disable SmartScreen.
How to turn off SmartScreen using Windows security settings
The easiest way to turn off SmartScreen is through Windows Settings. You can configure all aspects of your system's security from Windows Security. Here's how to do it.
1. Press Win + I to open Settings.
2. Open the tab Privacy and Security in the left pane.
3. Click Windows Security.
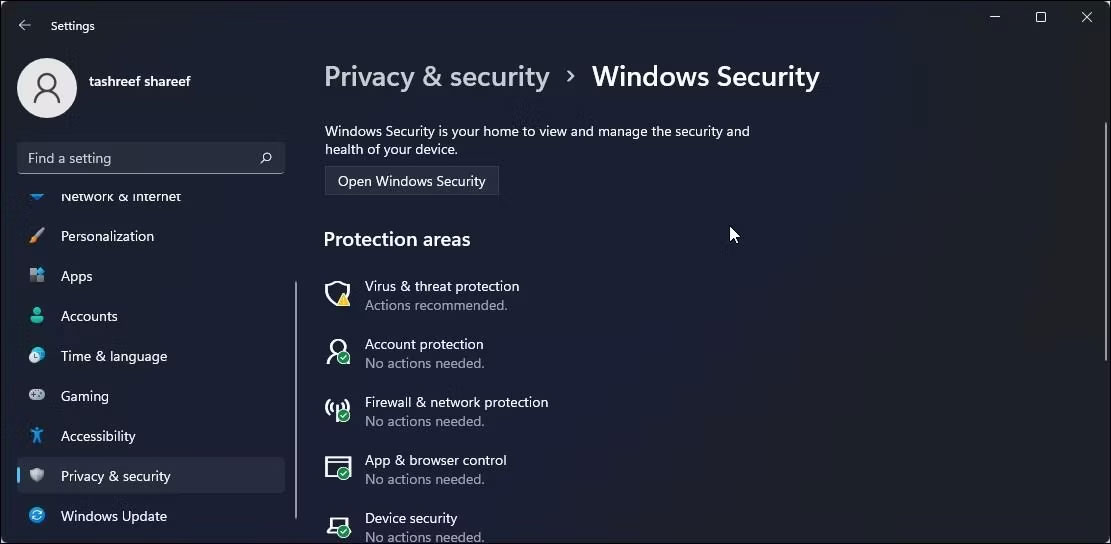
4. Next, click Open Windows Security.
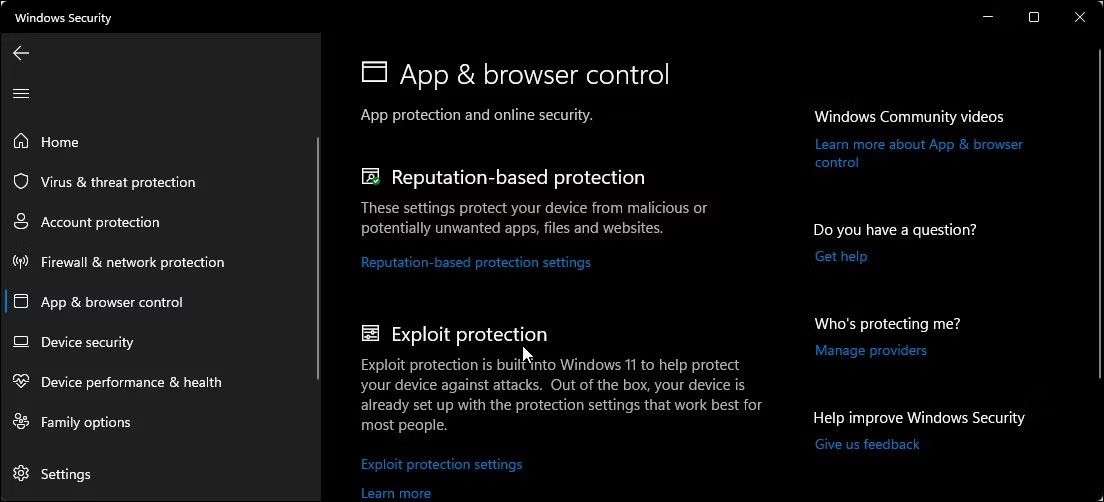
5. Open the tab App & browser control in the left pane.
6. Click Reputation-based protection settings in Reputation-based protection.

7. Here you will find 4 different SmartScreen filters that you can enable or disable individually. If you want to disable file and executable file filtering, disable the filters Check apps and files and Potentially unwanted app blocking. The remaining two filters are for Microsoft Edge and Microsoft Store apps.
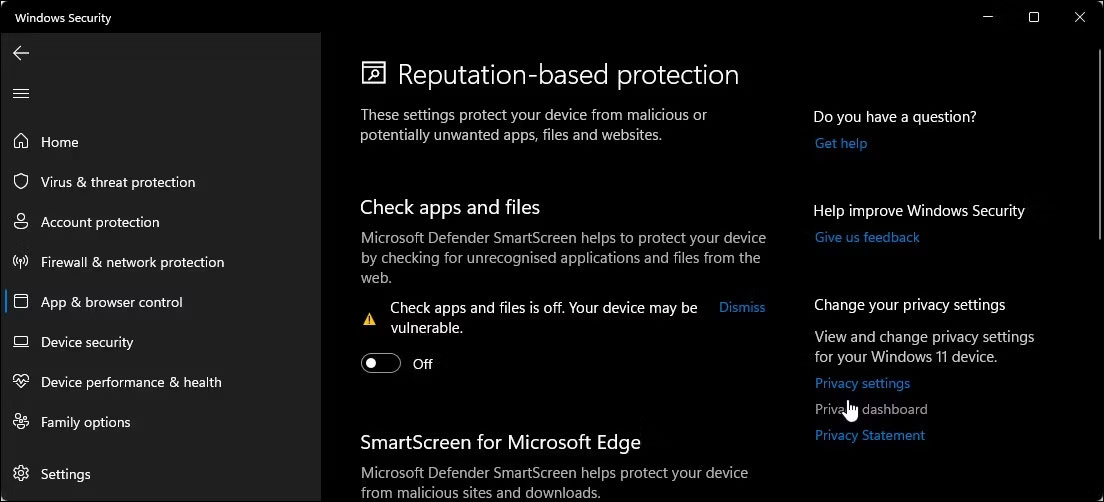
8. If you want to completely turn off SmartScreen, turn off all 4 filters.
If any SmartScreen filter is grayed out with a message “this setting is managed by your administrator” (this setting is managed by your administrator), you must contact your administrator or try another method.
How to turn off SmartScreen for Microsoft Edge
Microsoft Edge has a built-in option to enable and disable Microsoft Defender SmartScreen. Here's how to access it:
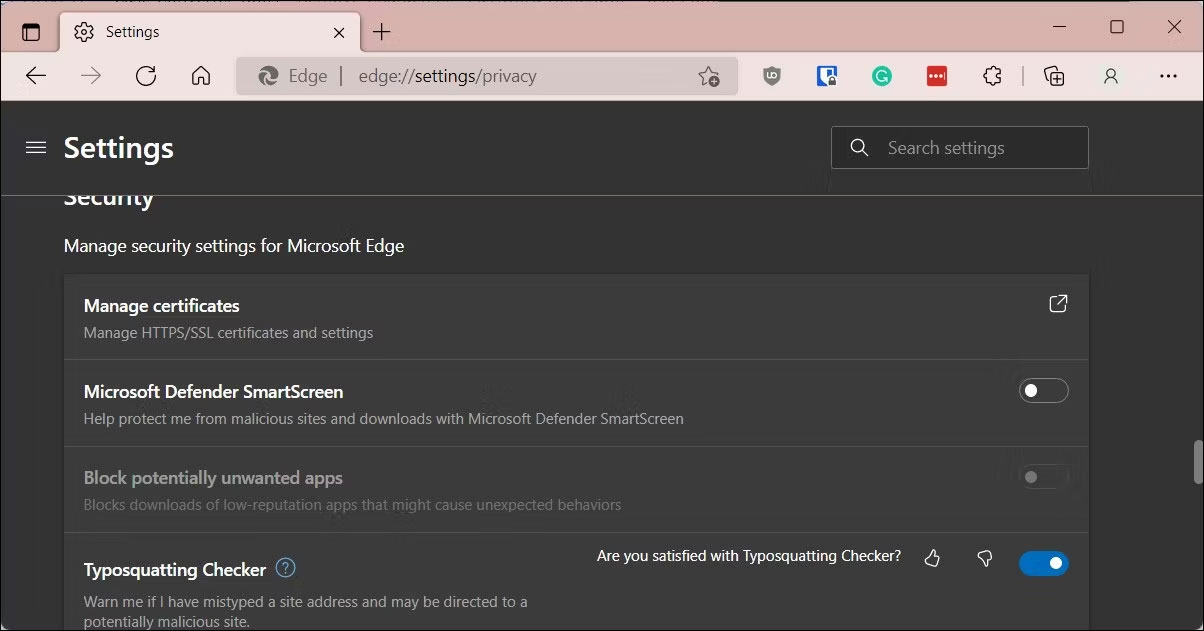
- Launch Microsoft Edge and click the three-dot menu icon in the top right corner.
- Click Settings.
- Open tab Privacy , search, and services in the left pane.
- Scroll down to the section Security.
- Turn off the transfer switch Microsoft Defender SmartScreen. This will also disable the option Block potentially unwanted apps.
- If you choose to turn SmartScreen back on, you must turn the feature on Block potentially unwanted apps manually.
Additionally, you can turn off SmartScreen for Microsoft Edge using the Windows Security and Registry Editor apps. Here's how.
Disable Microsoft Edge SmartScreen using Windows Security
Microsoft Edge SmartScreen helps you browse safely from phishing sites and malware you download. Unless it's managed by an administrator, you can turn it off.
1. Press Win + R to open Run.
2. Enter windowsdefender:// and click OK to open the Windows Security application.

3. Open the tab App & browser control in the left pane.
4. Next, click the link Reputation-based protection settings in Reputation-based protection.
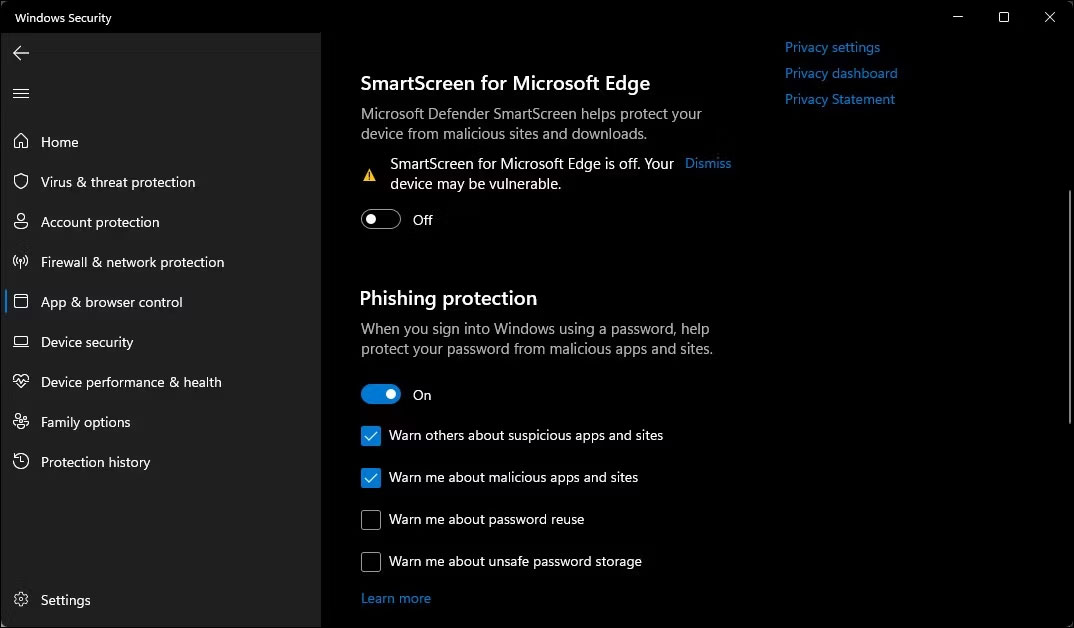
5. Turn off the transfer switch SmartScreen for Microsoft Edge to disable Microsoft Defender SmartScreen for Edge browser.
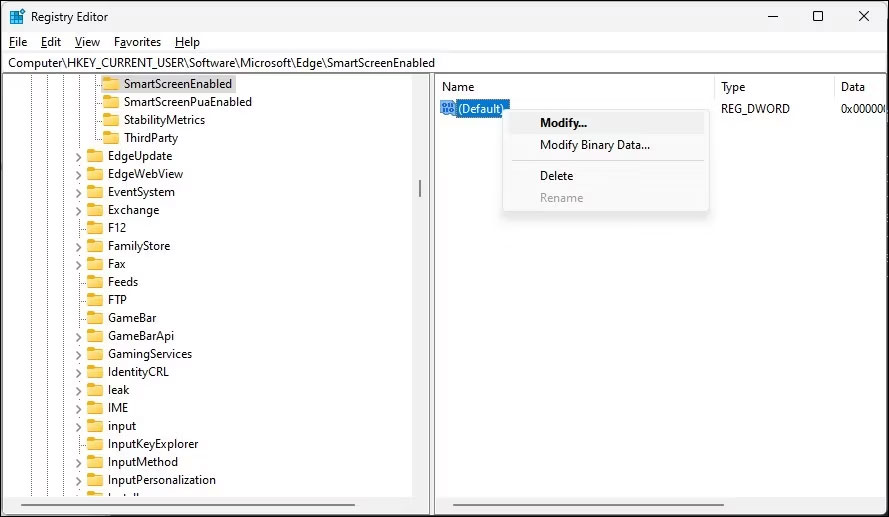
Disable SmartScreen for Microsoft Edge using Registry Editor
Editing the registry is an alternative (but more complicated) method to permanently disable SmartScreen for Edge browser.
1. Press Win + R to open Run.
2. Type regedit and press OK to open Registry Editor.
3. Next, navigate to the following location:
HKEY_CURRENT_USER\Software\Microsoft\Edge\SmartScreenEnabled4. In the right pane, right-click the value Default value and choose Modify.
5. Enter 1 enter school Value data and click OK to save changes.
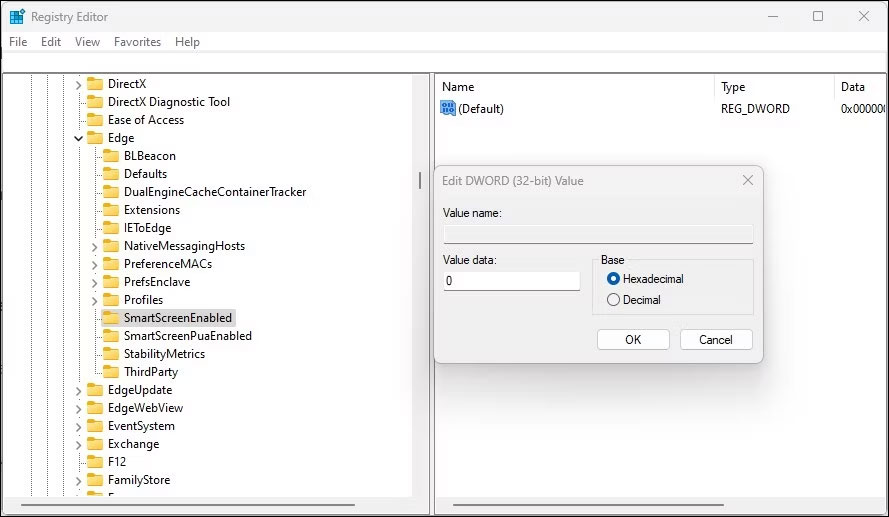
6. You may need to restart your computer to see the changes live.
How to turn off Windows Defender SmartScreen using Internet Properties
You can enable or disable Windows Defender SmartScreen using the Internet Properties dialog box in Windows 10. Also known as Internet Options, it allows you to configure security and access settings, add-ons, Active-X controls , etc..
Follow these steps to turn off SmartScreen using Internet Options:
1. Press Win + R to open Run.
2. Type control. control and press OK to open Control Panel.
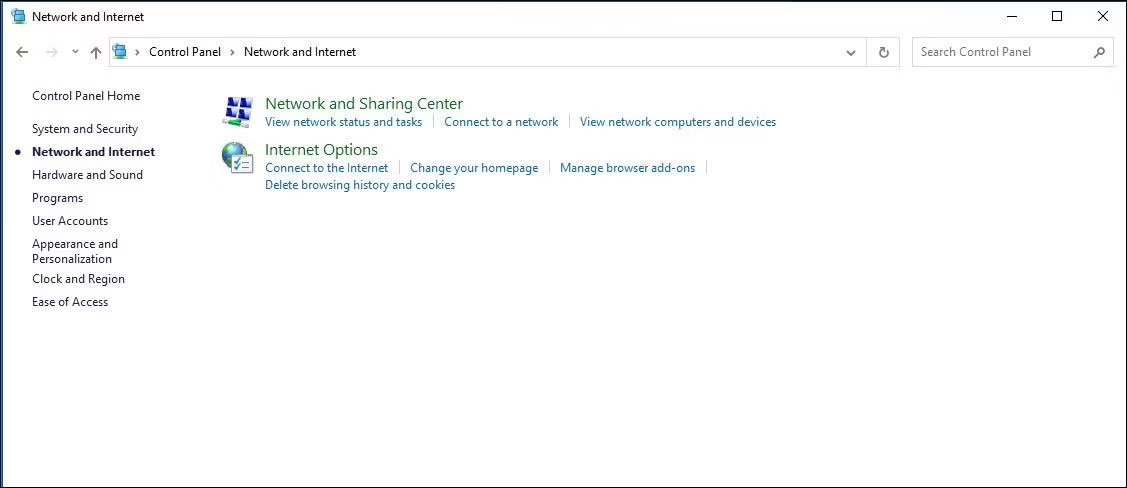
3. Click Network and Internet.

4. Next, click Internet Options.
5. In the window Internet Propertiesopen the tab Advanced.
6. Scroll down to the section Security.
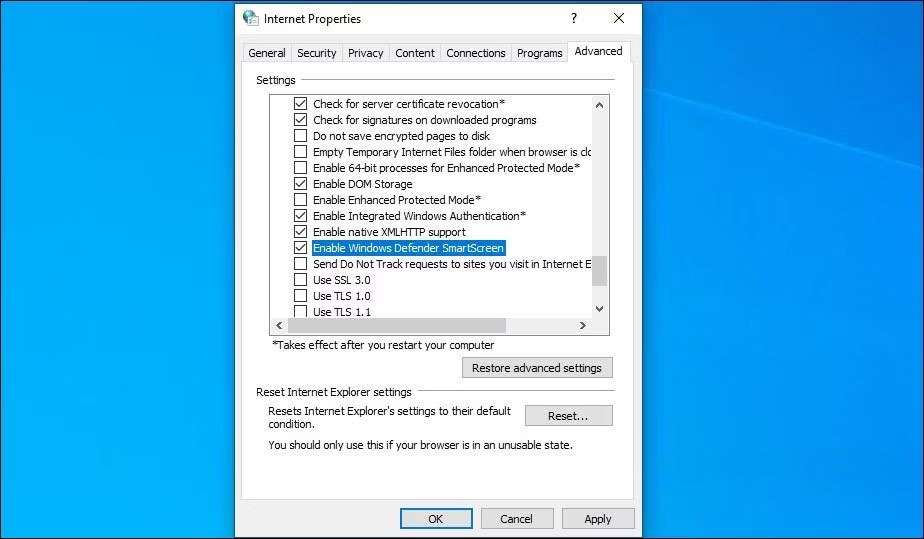
7. Uncheck the option Enable Windows Defender SmartScreen.
8. Click Apply > OK to save changes.
On newer versions of Windows, including Windows 111, you may not find any options to enable or disable Windows Defender SmartScreen in Internet Properties.
How to enable or disable SmartScreen using Registry Editor
You can also enable or disable Windows Defender SmartScreen using Registry Editor. This is useful if you can't access it from the Settings app or Internet Properties.
Note that incorrectly modifying the registry can cause system malfunctions. Therefore, create a restore point before proceeding with the steps below.
1. Press Win + R to open Run.
2. Type regedit and press OK to open Registry Editor. Click Yes If prompted by UAC for admin rights.
3. In Registry Editor, navigate to the following location:
HKEY_LOCAL_MACHINE\SOFTWARE\Policies\Microsoft\Windows\System4. In the right pane, specify the filter value EnableSmartScreen. You will need to create a new value if no value is found.
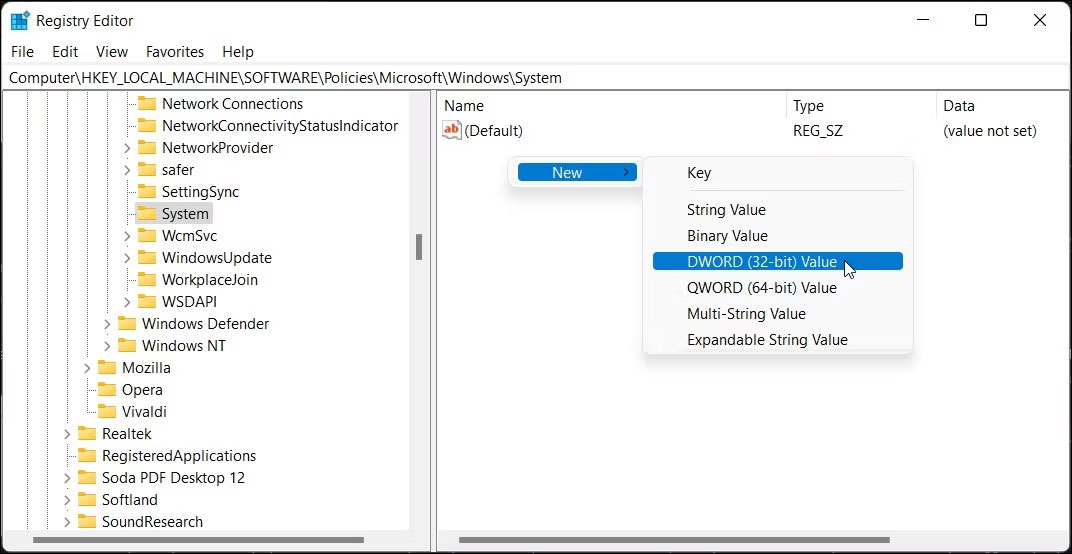
5. To create a new value, right-click on the key System and choose New > DWORD (32-bit) Value.
6. Rename the value to EnableSmartScreen.
7. Next, right-click on the value EnableSmartScreen and choose Modify.
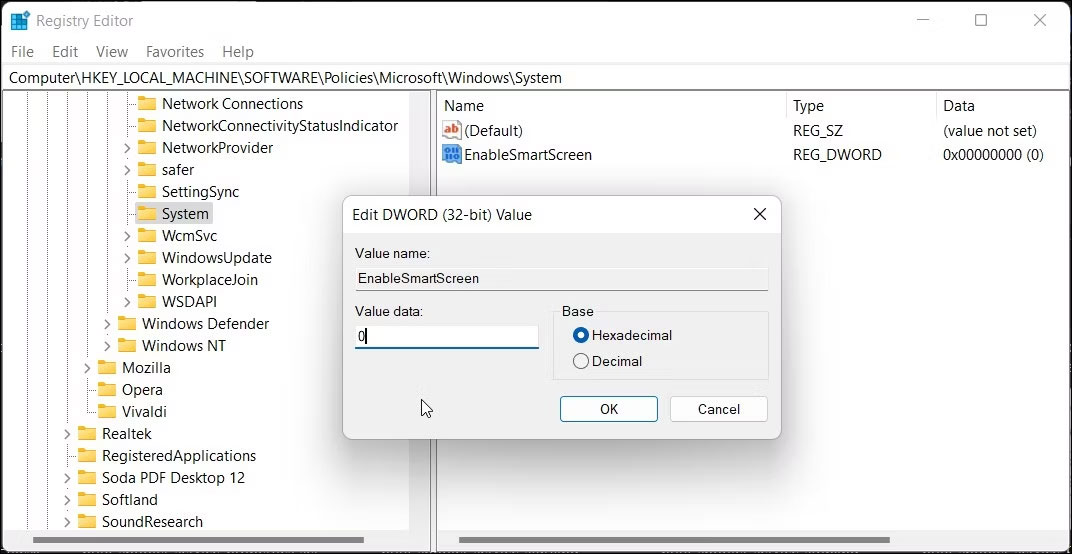
8. Enter 0 enter school Value data and click OK to save changes.
9. To enable the SmartScreen filter, enter 1 enter school Value data and click OK.
10. Close Registry Editor and restart your PC to apply the changes.
You can further adjust the registry to create String Value new to set the blocking level to Warn or Block. Use Warn will display a SmartScreen warning with the option to continue. On the contrary, optional Block will display a warning and block the application from running on your computer.
To set a new ShellSmartScreenLevel string value in the Registry Editor:
1. Right click on the subkey System and choose New > String Value. Rename the value to ShellSmartScreenLevel.
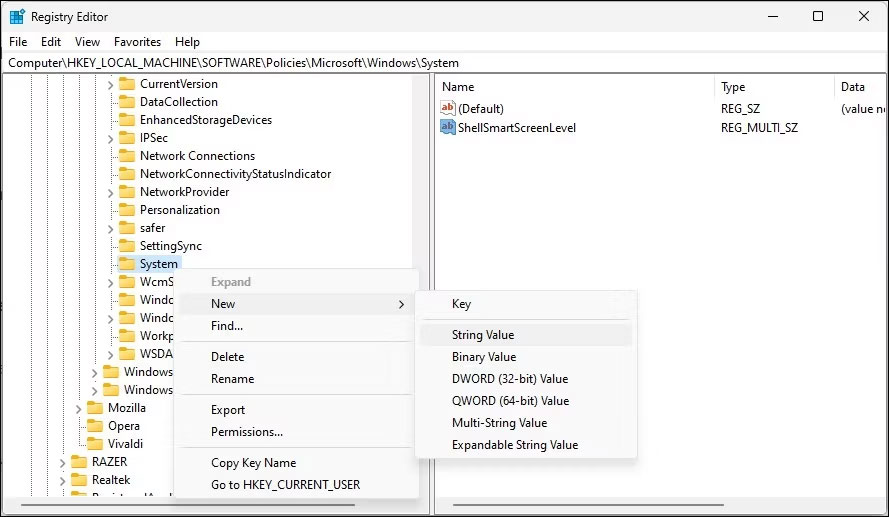
2. Next, right click ShellSmartScreenLevel and choose Modify.
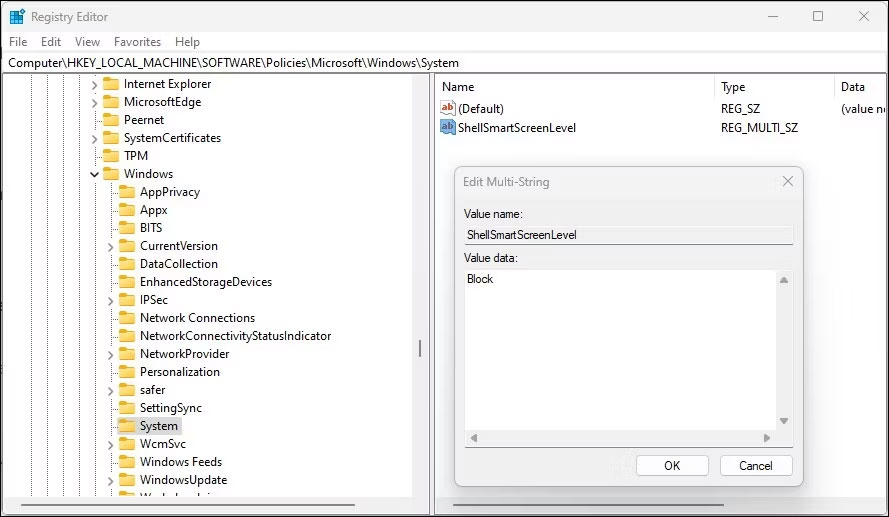
3. Enter Warn or Block depends on what you want SmartScreen Level perform. Press OK to save changes and exit Registry Editor.
How to enable or disable SmartScreen filter using Group Policy Editor
If you want to manage SmartScreen filters for multiple computers in your organization, you can use Group Policy Editor to perform this task.
Note that Group Policy Editor is only available on Windows Pro, Edu, and Enterprise versions of the operating system. If you are using Home, explore Quantrimang.com's instructions to enable Group Policy Editor on Windows Home version.
To configure the SmartScreen filter using GPEdit:
1. Press Win + R to open Run.
2. Enter gpedit.msc and click OK to open Group Policy Editor.
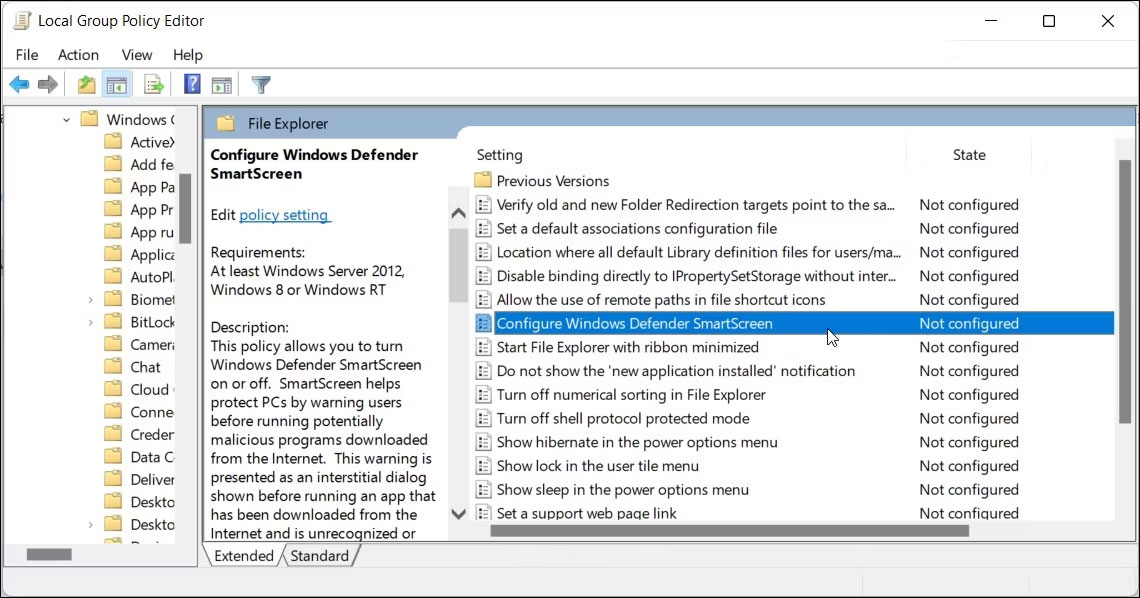
3. Next, navigate to the following location in Group Policy Editor:
Computer Configuration > Administrative Templates > Windows Components > File Explorer.4. In the right pane, right-click the policy Configure Windows Defender SmartScreen and choose Edit.
5. To turn off SmartScreen, select Disabled.
6. If you want to enable SmartScreen, select Not Configured or Enabled.
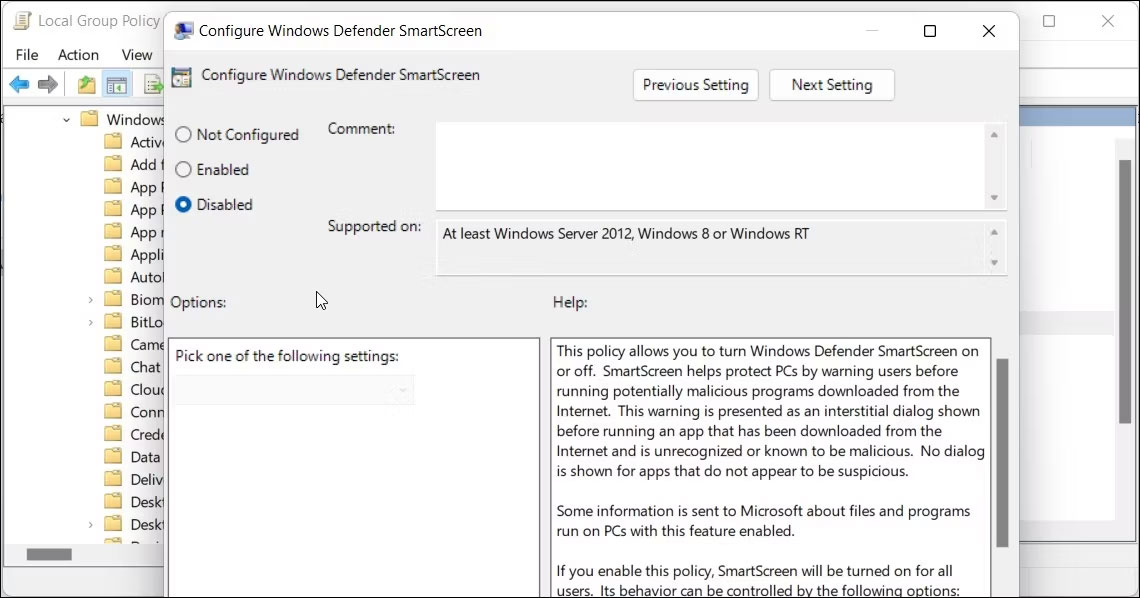
7. Click Apply > OK to save changes.
8. Close Group Policy Editor and restart your PC.
Wish you success!
Refer to some more articles below:
