

Creating folders in Canva helps us organize uploaded designs and files much more neatly and scientifically. We will group designs with the same purpose and content into one folder. And so you just need to access the folder to find designs on Canva faster. Below are instructions for creating folders in Canva.
How to create folders in Canva
Quick guide
- Click on the Project section in the Canva interface
- Select more in the Canva interface
- Add folders in Canva
- Name the Canva folder
Detailed instructions
Step 1:
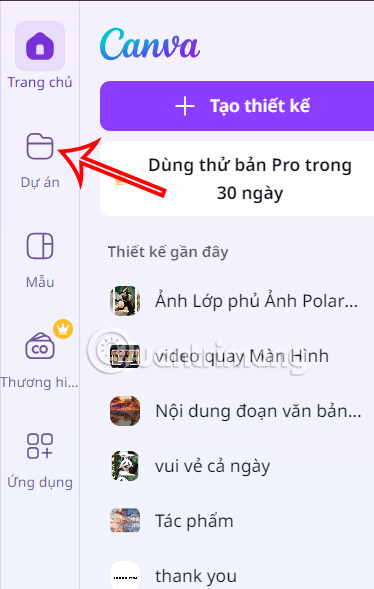
At the interface on Canva, click Project section on the left edge of the interface.
Step 2:
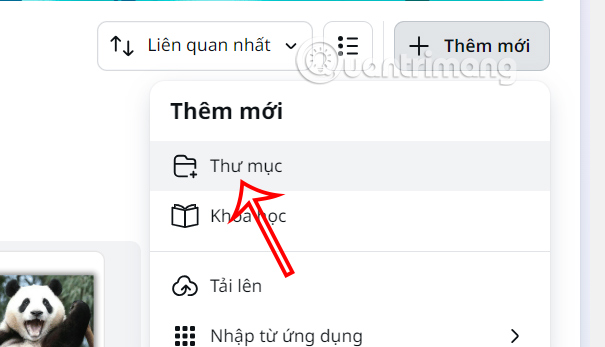
Looking at the interface with your designs, we click Add New option then select next Directory below to create.
Step 3:
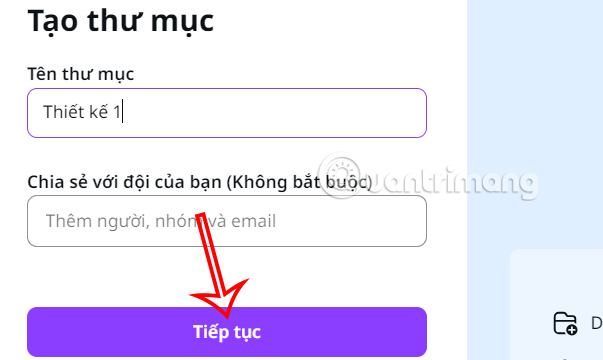
Shows the interface with options for creating folders in Canva. Friend enter the folder nameadd the email of the person you want to share with if you want, then click Continue below.
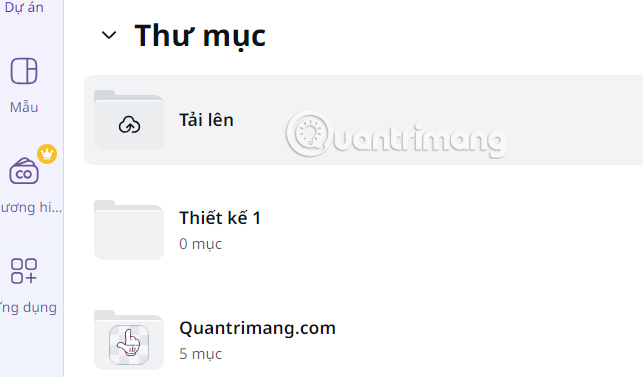
So we have successfully created the folder. Scroll down to the Project section and you will see the folder created on Canva.
How to add projects to Canva folders
Quick guide
- Add existing designs to the Canva folder
- Choose a type for the design to add to Canva
- Create a new design in the folder
Detailed instructions
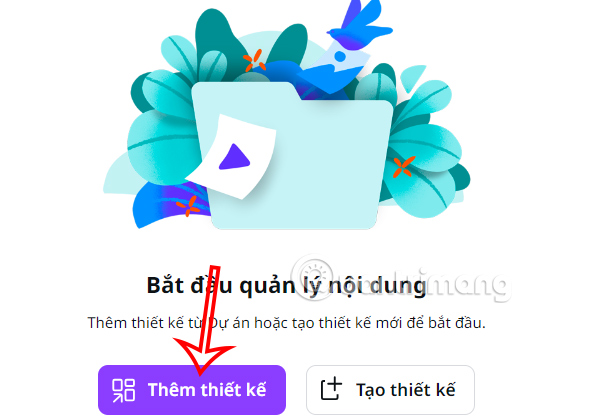
Step 1:
In the folder on Canva, click Select Add Design to add available designs.
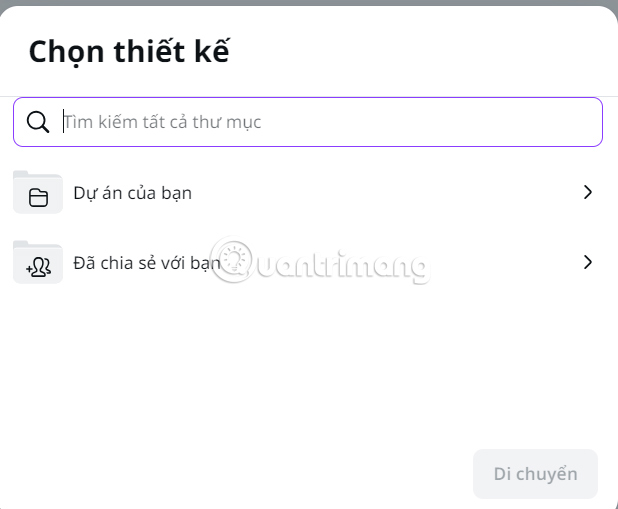
Step 2:
Now displayed Option for you to add projects your own or shared projects. When you click, it will expand the projects and designs inside.
If you want to add any design to the folder, click to select it Press Move under.
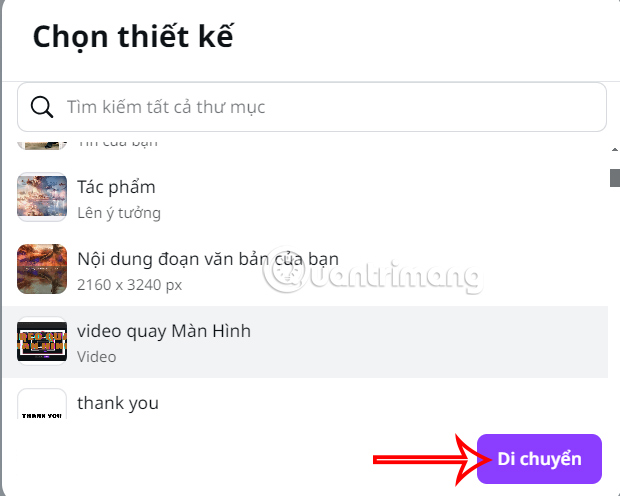
Soon we will see the design transferred to the folder on Canva.

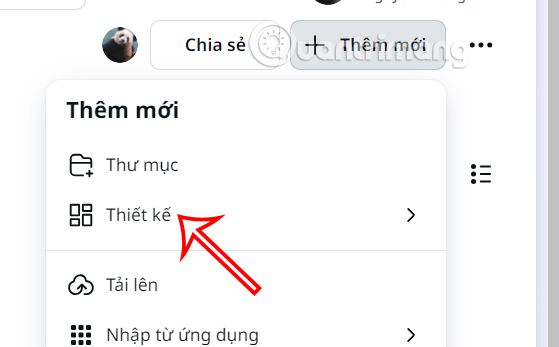
Step 3:
The next time you add a design, click on it Add New section and then select Design It's okay to add.
Step 4:
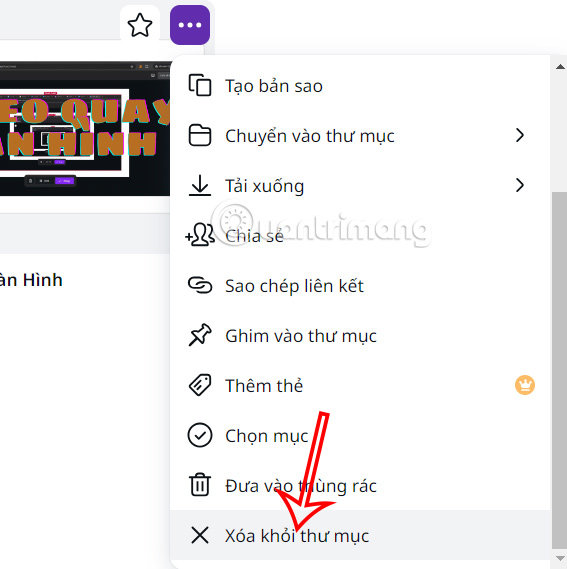
Press 3 dot icon in each design You will have options as shown, you can delete the design from the folder if needed.
