

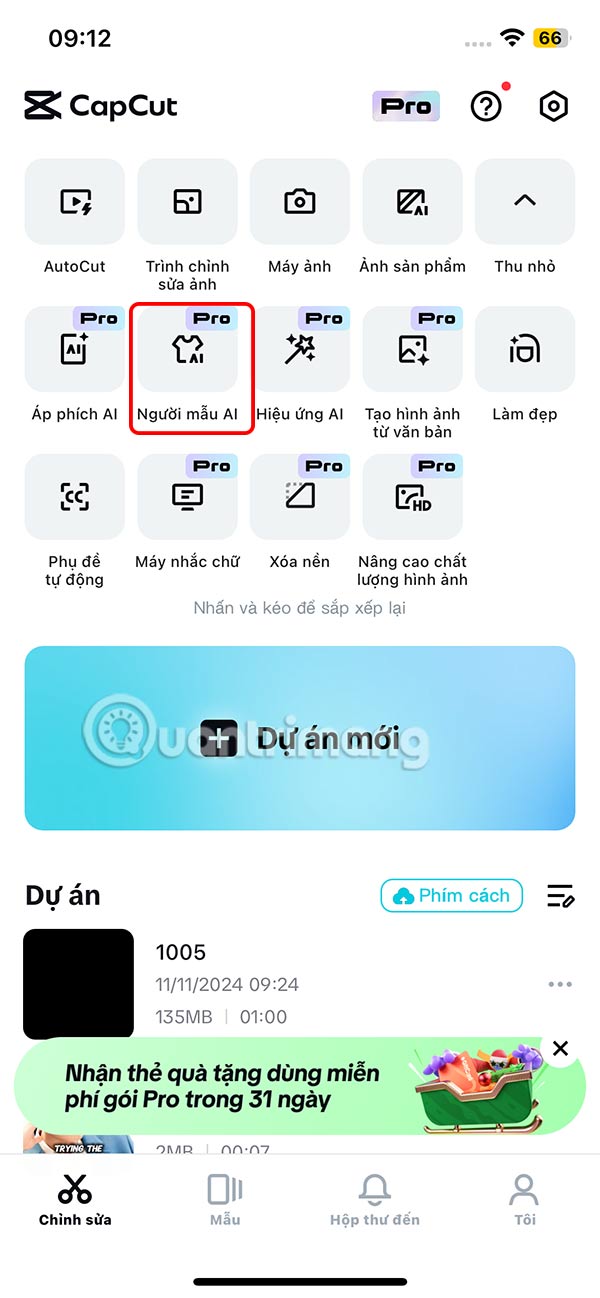
AI feature on Capcut supports users to create and design many videos, such as putting product photos into the model to be on Capcut AI to get a cover photo or photo you need. With the product image grafting feature into the model, we just need to choose a model, shape and then upload the product. Automatic product photo is grafted into a model for you to print when needed. Below are instructions for putting product photos into models on Capcut AI.
How to put product photos into a model on Capcut
Step 1:
You click on Edit section Then expand the design, click on AI model To use. Press Try now To try it out.

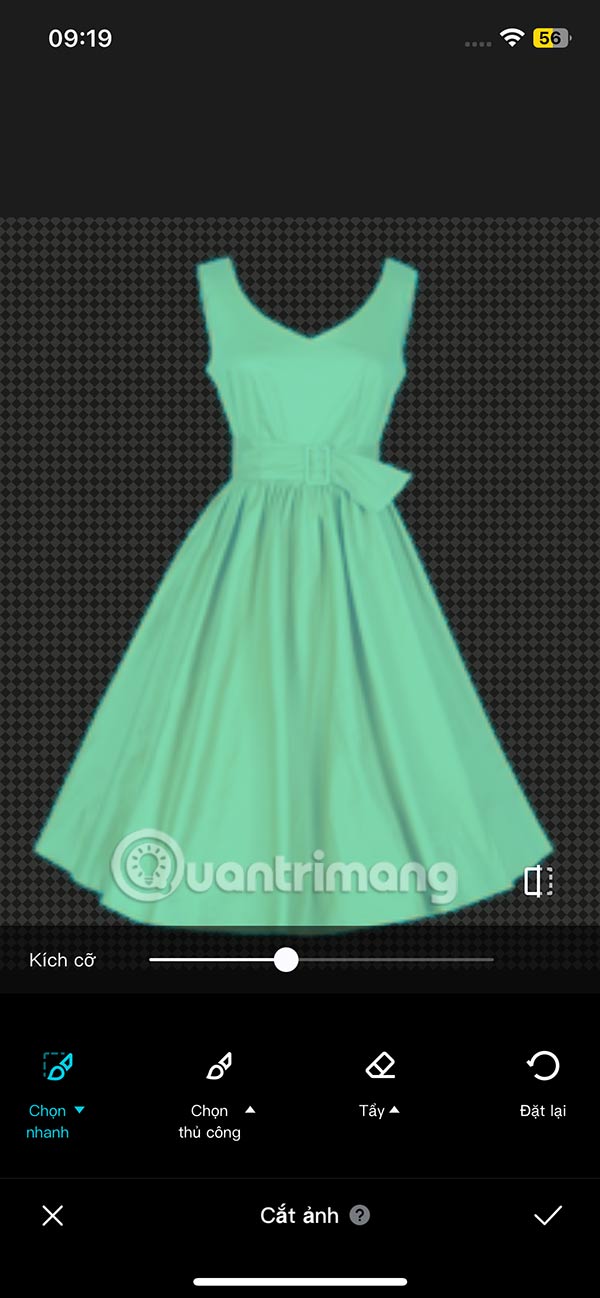
Step 2:
Move into the main interface, you Select model photos But I want to use later, click on shape To choose the standing figure for the model. Friend Choose a standing design To match the upcoming transplant product model.
Step 3:
Continue to click The symbol of plus To upload the product image. After uploading the product image, you Click on the image then select continued pen icon To edit product photos.
Step 4:
Then the user can Adjust the product image area In my opinion.
Final press To pair the product image into the model on Capcut. Now you will see the model image with the product as below. If we want to download the image, we need the Capcut Pro version to download.


