

When connecting the printer to the computer, by default the system will display all the names of all the printers connected to the computer as well as previously connected. In case users use multiple printers on 1 computer, the renaming of the printer will be easier to use. We can name separately for each type of machine so as not to use the machine wrongly. The following article will guide you how to rename the printer on Windows 10.
Instructions to rename Windows 10 printer
Method 1: Change the printer name via Settings
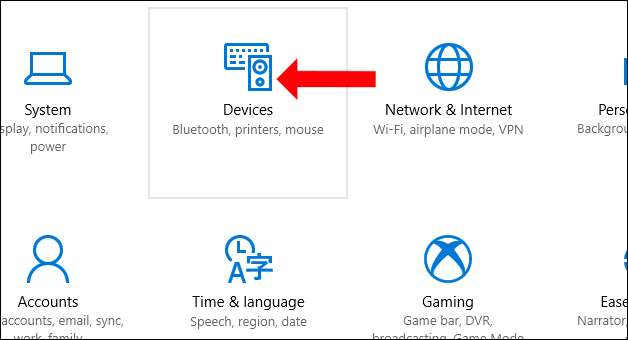
Step 1:
We click on Settings button On the interface and then click on Section Devices. Or you can press Windows + I to open the Windows Settings interface.
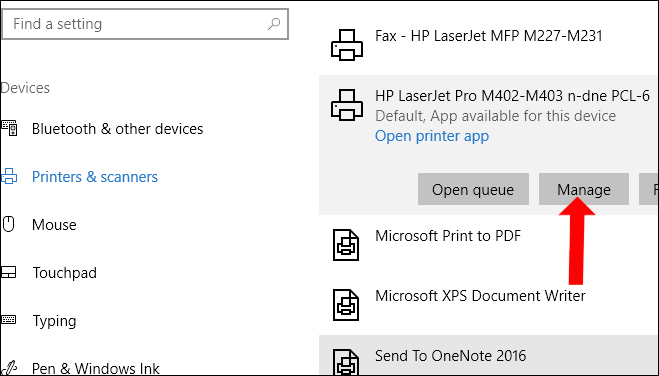
Step 2:
A new interface appears to look down Printers & Scannersthen looking to the right we will see all the printers are linked to the computer. Click on the printer you want to change the name, then click Manage button.
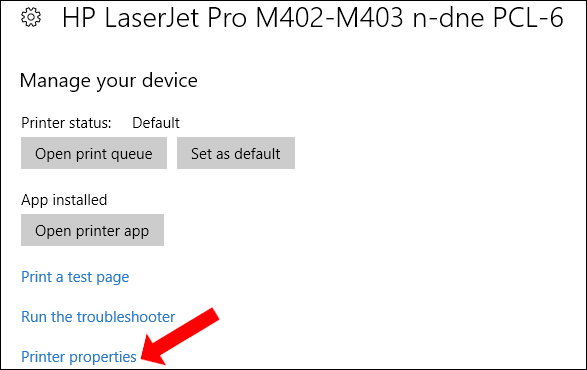
Step 3:
Switch to a new interface click Printer Properties.
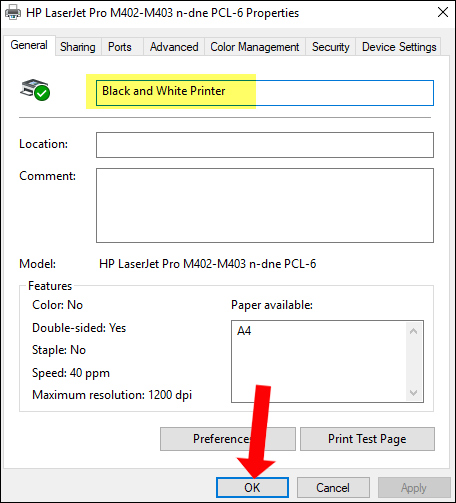
Click next Tab Genetal to proceed Edit the name of the printer Right at the top line. Final Click OK To save change.
Method 2: Change your computer name via Control Panel
Step 1:
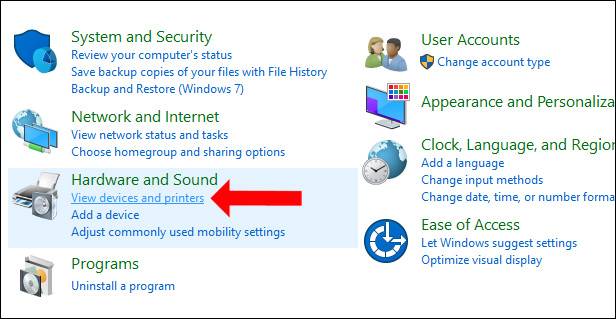
Open interface Control Panel Then in the item Hardware and Soundclick on the item View Devices and Printers.
Step 2:
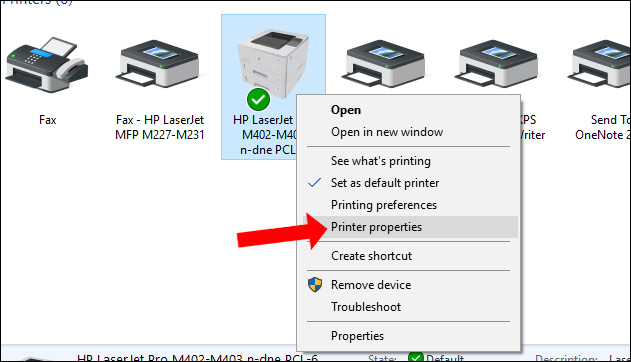
At the new interface, the user right -click on the printer wants to change the name and click on the option Printer Properties In the right mouse menu.
Step 3:
The dialog box appears similar to the way 1. In the General tab, users only need to change the name of the printer to the new name they want to order and click OK to save the new name is done.

Method 3: Change the printer name with PowerShell
To change the printer's name with the PowerShell command, follow these steps:
1. Open open Start.
2. Search PowerShellRight -click on the top results and select the option Run as administrator.
3. Enter the following command to list the available printers and press Enter:
Get-Printer | Format-Table Name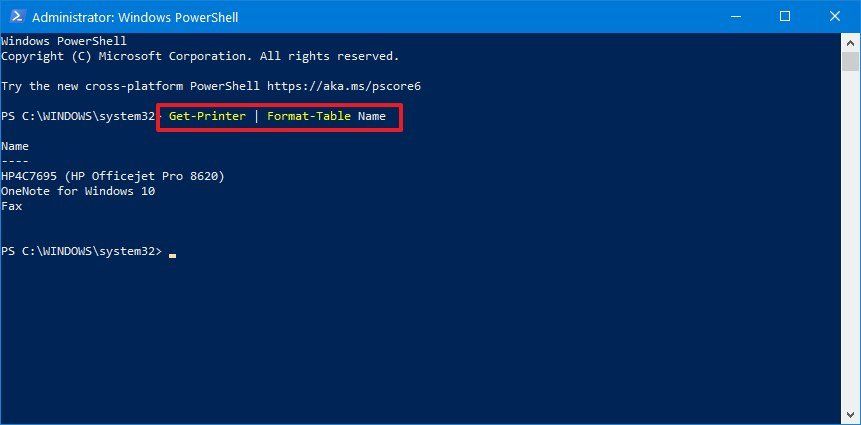
4. Enter the following command to rename the printer and press Enter:
Rename-Printer -Name "CURRENT-PRINTER-NAME" -NewName "NEW-PRINTER-NAME"For example, the following command changed the name of the printer “HomePrinter”:
Rename-Printer -Name "HP4C7695 (HP Officejet Pro 8620)" -NewName "HomePrinter"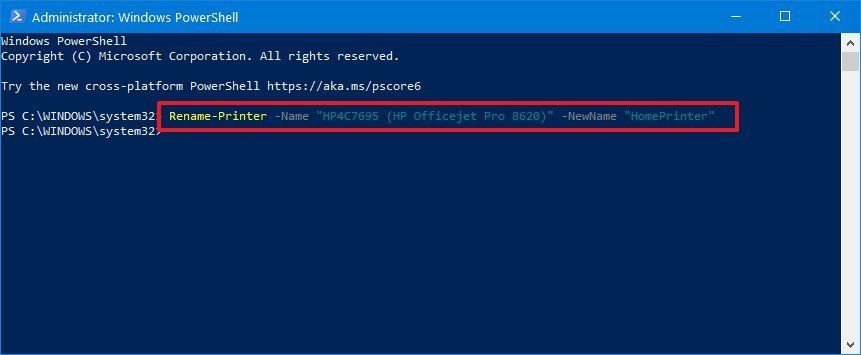
After you complete the steps, the PowerShell command will change the name of the printer into the name you specified.
Method 4: Change the printer name with Command Prompt
Although the steps are not very easy, if you want to do so, Command Prompt will provide how to change the printer name using the script “prncnfg.vbs” on Windows 10.
To change the name of the printer with Command Prompt, follow these steps:
1. Open open Start.
2. Search PowerShellRight -click on the top results and select the option Run as administrator.
3. Enter the following command to change the printer name and press Enter:
cscript %WINDIR%\System32\Printing_Admin_Scripts\en-US\prncnfg.vbs -x -p "CURRENT-PRINTER-NAME" -z "NEW-PRINTER-NAME"For example, the following command changes the printer's name to “HomePrinter”:
cscript %WINDIR%\System32\Printing_Admin_Scripts\en-US\prncnfg.vbs -x -p "HP4C7695 (HP Officejet Pro 8620)" -z "HomePrinter"
After you complete the steps, the script will run and change the printer's name with the name you specified in the command.
By changing the name of the printer is extremely easy, we can link to the printer to work quickly, avoiding the case of connecting to another printer. 4 ways to rename the printer above you can apply to different versions of the operating system.
I wish you success!
See also:
