

Domain Name System (DNS) converts domain names into IP addresses. Web browsers use these IP addresses to load web pages and ensure that you do not have to remember the IP address of each website.
Sometimes you will want to see which DNS server your PC is connecting to, because the server you are using has gone down or because you want to switch to an alternative server quickly or more securely. Luckily, there are many ways to see which DNS server you are using on Windows 11.
Method 1: Check DNS server using Settings menu
The Settings menu is the central hub of your Windows PC. It allows you to adjust options, configure the operating system, and manage all connected devices. You can also use Windows settings to check your current DNS server on Windows 11.
Here's how:
1. Launch the Start menu by pressing the key Win.
2. In the search bar, enter Settings and press Enter. Menu Settings will open.
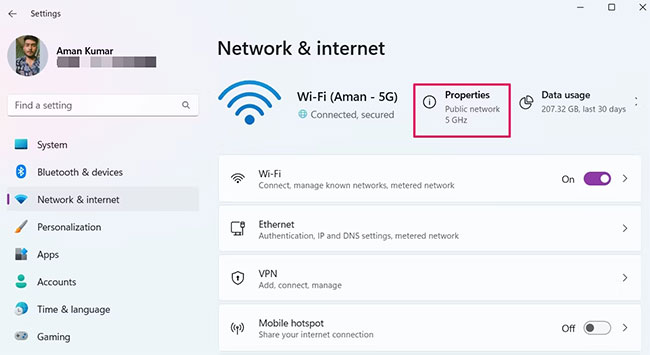
3. Select Network & Internet from the left panel.
4. Select options Properties next to the name of the connected network.
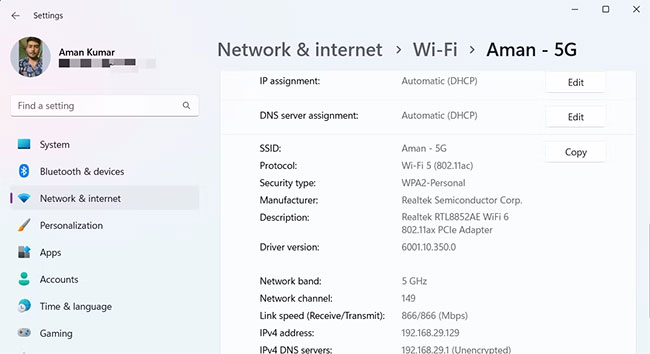
5. In the following window, you can see the DNS server. It will be next to the option IPv4 DNS Servers.
Method 2: Check DNS server in Advanced Network Settings
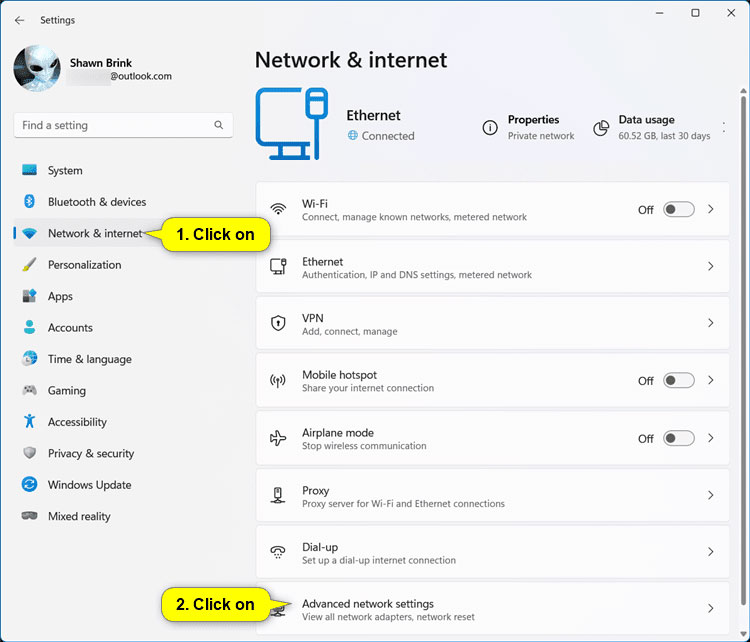
1. Open Settings (Win + I).
2. Click Network & internet on the left and tap Advanced network settings on the right.
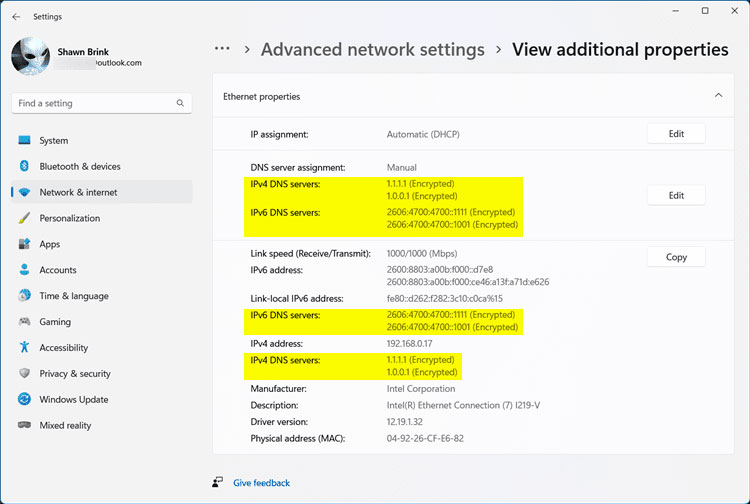
3. Click on the network adapter (eg “Ethernet”) that you want to know the DNS servers it uses to extend it and click View additional properties.

4. Now you will see the addresses IPv4 DNS Servers and IPv6 DNS Servers used by this network adapter.
Method 3: Check DNS server using Control Panel
Control Panel is an essential component of Windows that allows you to configure many different system settings. You can use it to manage applications, enable or disable hardware, change user accounts, resolve system problems, and test DNS servers.
To check DNS server using Control Panel, follow these instructions:
1. Open the Run dialog box with the hotkey Win + R.
2. In the search bar, enter Control Panel and press Enter. It will open the Control Panel window.
3.Change the icons View by wall Large.
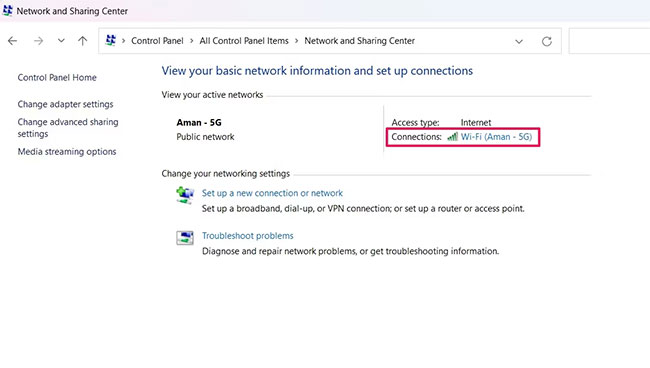
4. Select Network and Sharing Center.
5. Click the link next to the option Connections.
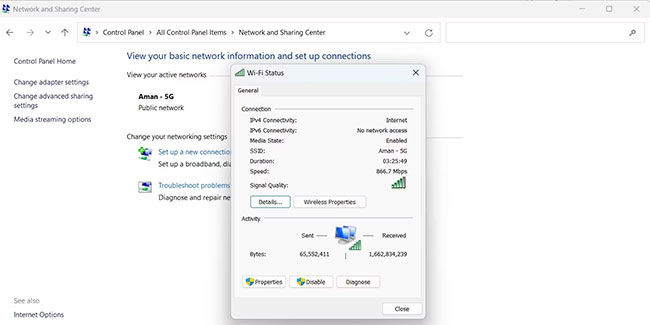
6. Click the button Details in the window that appears.
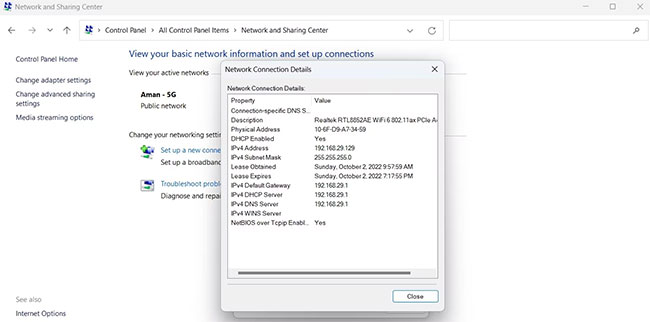
7. You can see the DNS servers in the new window that appears. It will be next to the option IPv4 DNS server.
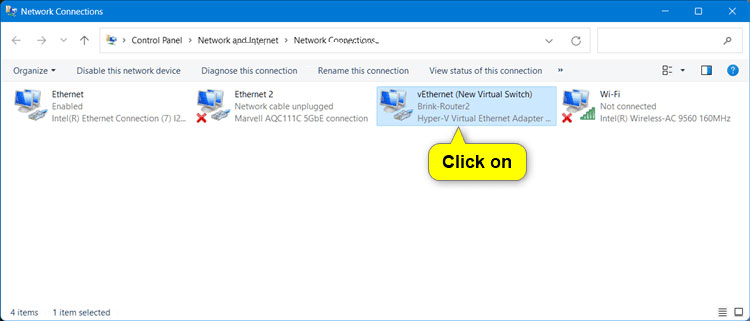
Method 4: Check DNS server in network connection
1. Open Control Panel (icon view) and click the icon Network and Sharing Center.
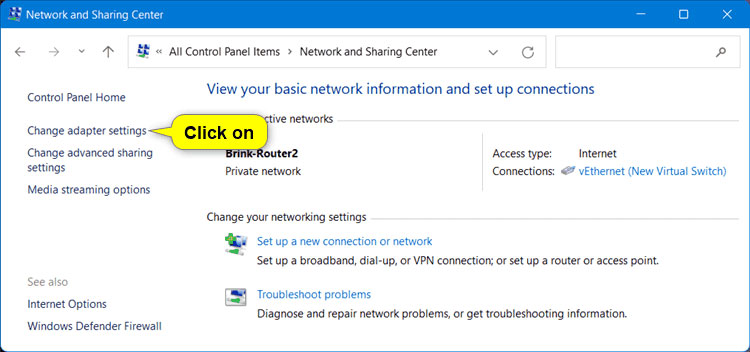
2. Click the link Change adapter settings on the left side of the Network and Sharing Center.
3. Click the network adapter (for example, “vEthernet (New Virtual Switch)”) for which you want to know the DNS servers it uses.
4. Click Details.
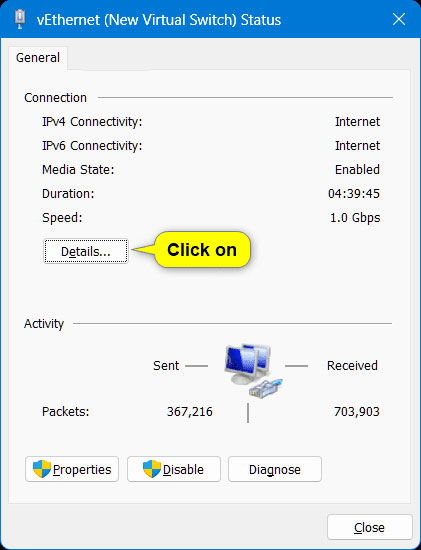
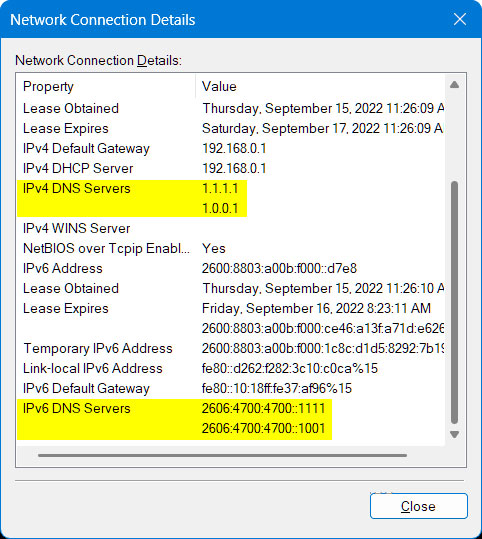
5. Now you will see the addresses IPv4 DNS Servers and IPv6 DNS Servers used by this network connection.
Method 5: Check DNS server using Command Prompt
Command Prompt is a command line interface for the Windows operating system that is a fun way to interact with your computer using text commands. You can use Command Prompt to list and change folders, create or delete files and folders, manage networks, etc.
You can also use Command Prompt to check your current DNS server. Here's how:
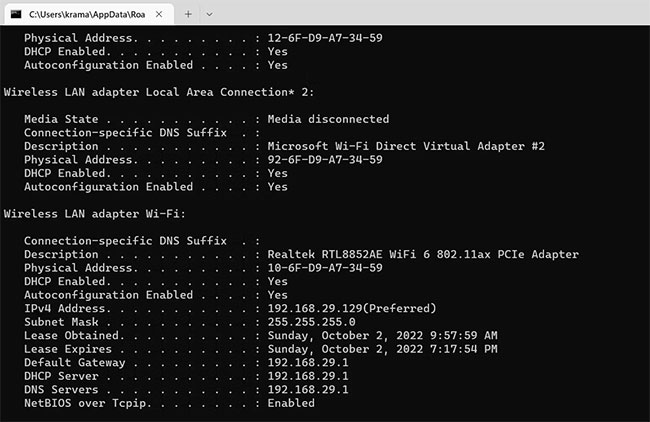
1. Open the menu Startenter Command Prompt and choose Run as administrator from the right pane.
2. In the Command Prompt window, enter ipconfig /all and press Enter.
3. You can see the DNS servers in the information that appears on the screen.
Method 6: Check DNS server using Windows PowerShell
You can use Windows PowerShell to perform a variety of tasks, including checking the DNS servers set up on your computer. Here's how:
1. Open Windows PowerShell.
2. In the PowerShell window, enter Get-DnsClientServerAddress and press Enter.
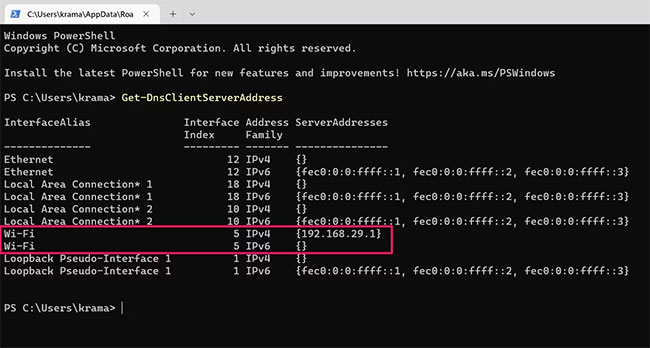
You can see DNS servers next to your network type. If you are using a WiFi connection, DNS server will appear next to the WiFi option. Meanwhile, if you are using Ethernet, DNS servers will appear next to the option Ethernet.
Now, you know all the ways to check DNS server on Windows 11. All of these methods are quick and easy to do. You can choose the one that you find easiest to implement.
Sometimes, the default DNS server may not be one of the fastest. In such a case, you can change your server to many alternatives.
