

To access Control Panel on Windows 11 is extremely simple, but this article will guide you to add Control Panel to the Windows 11 context menu. Then users just need to right-click and select Control Panel to access. . Below are the steps to add Control Panel to the Windows 11 context menu.
Instructions for adding Control Panel to the Windows 11 context menu
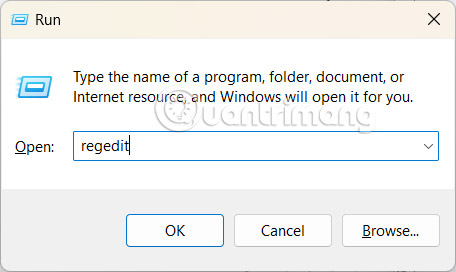
Step 1:
You press Win+R key combination Already import regedit and click OK to open Registry Editor.
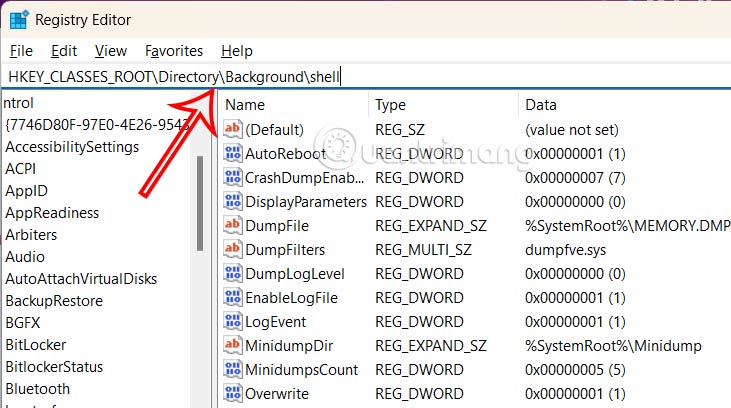
Step 2:
Displaying the new interface, we access it by following the link HKEY_CLASSES_ROOT\Directory\Background\shellor you can paste this path into the Registry Editor path.
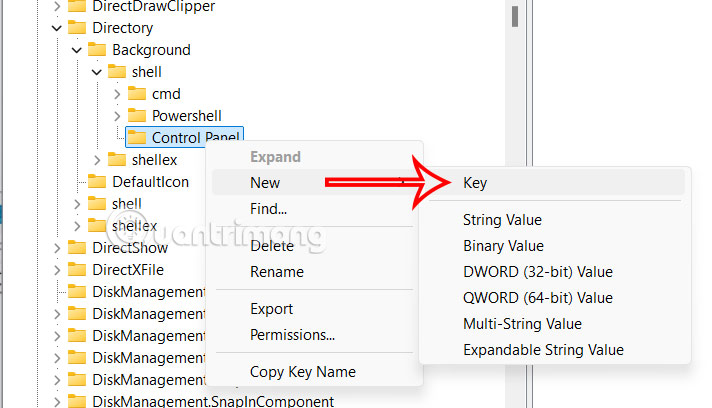
Step 3:
User presses right mouse enter shell key and select New then select Key in the menu displayed.
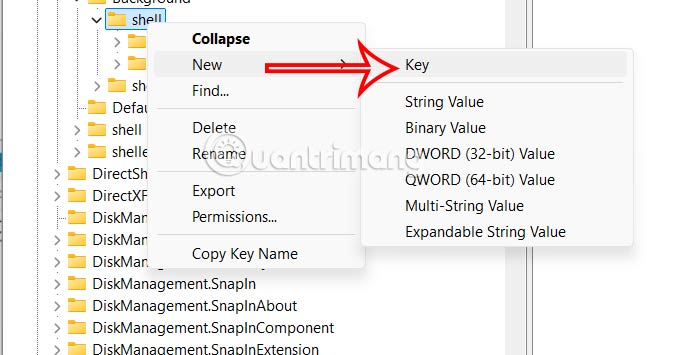
We name this key Control Panel.
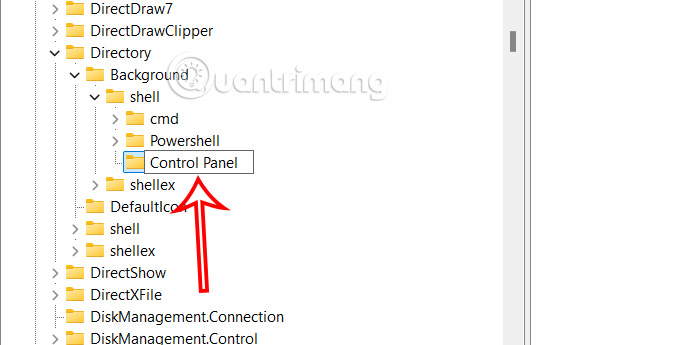
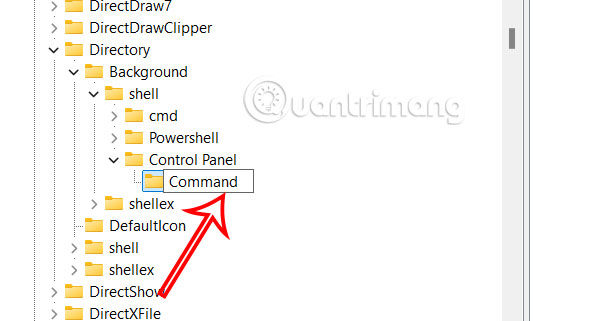
Step 4:
Continue right click enter Control Panel lock that you just created and select Newselect next Key to generate a new key.
Now you name the new key Command.
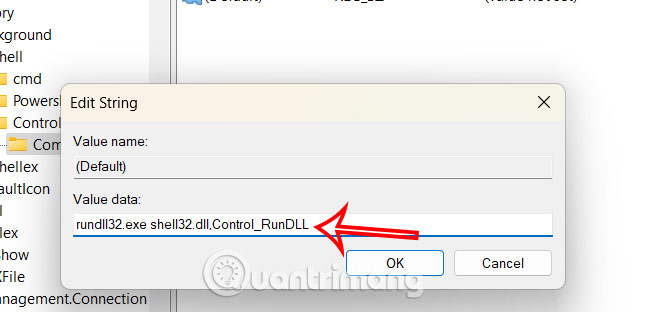
Step 5:
Press the Command key then Click on the Default value in the next interface to change. This time you import rundll32.exe shell32.dll,Control_RunDLL in the Value data field line and click OK as shown below.
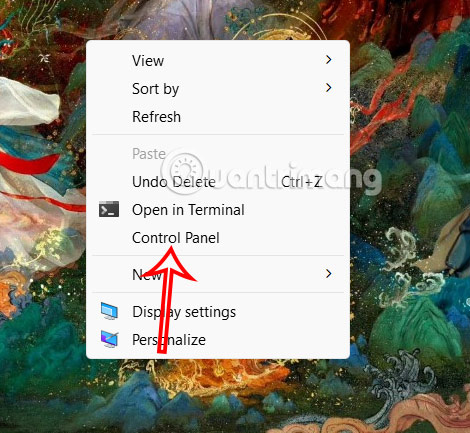
Now you right click on the Windows desktop, then Select See more options and will see Control Panel in the context menu.
If you want to remove the Control Panel in the Windows 11 context menu, just delete the Command key you created earlier.
