
If you have never installed Windows or ghosted your computer, don't know how to get to the boot screen, and don't know anything about Legacy or UEFI standards, you don't need to worry too much. Installing Windows is not as scary as you think, just a few clicks is fine (at best, take it to the store and reinstall it a few times and you'll know :D). In this article, TipsMake.com will guide you to install Windows 10 from USB.
Installing Windows 10 from USB requires a USB boot or Windows 10 ISO file. Installing Windows 10 using USB is not too difficult if you follow the detailed Windows 10 installation instructions below from Network Administrator.
Prepare to install Windows 10 from USB
Instructions for installing Windows 10 from USB
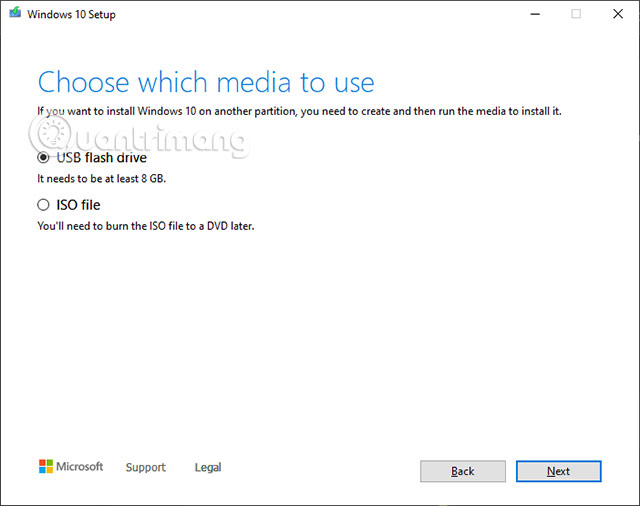
Step 1: First you need to have a USB of 8GB or more, download the Windows 10 installation file on your USB according to the link above.
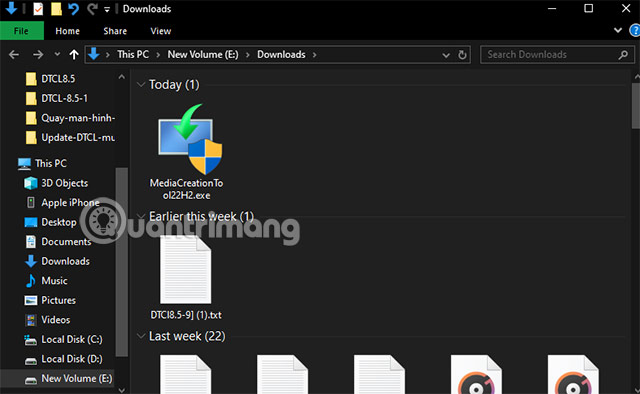
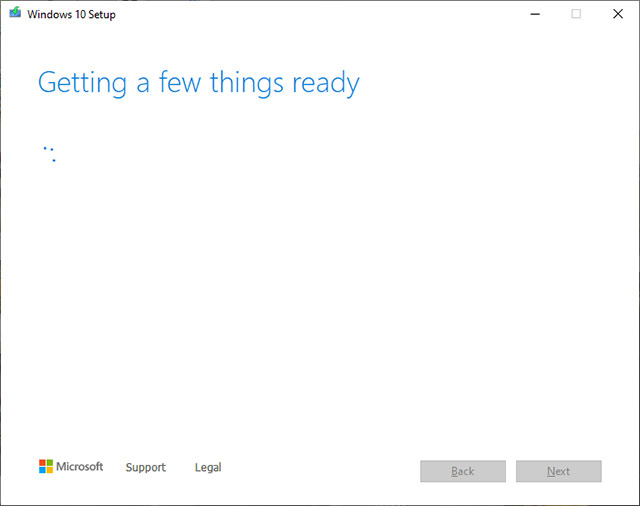
Start the installation file with the name MediaCreationTool22H2.exe. Wait a while for the file to launch.
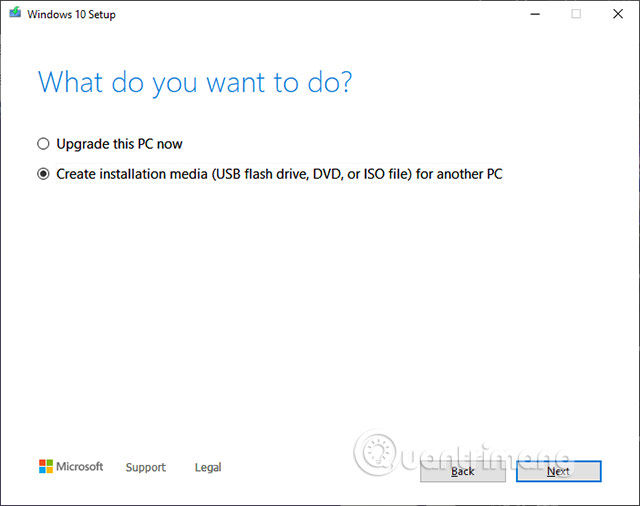
Select next Create installation media (including USB, DVD or ISO file) for PC.
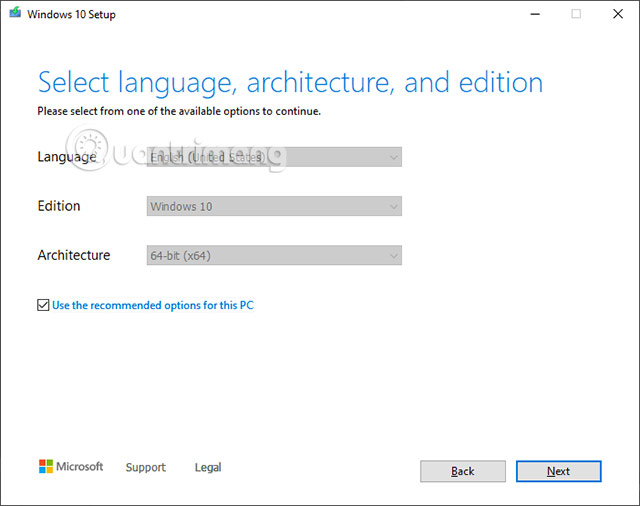
Select Use the recommended options for this PC to create a Windows 10 installer on USB according to default settings. If you want to change the language, installation version and x64 or x86, uncheck that option.
Select USD Flash Drive, navigate to your USB and select the USB device you want, then wait for the USB to complete the setup and installation in your USB.
Step 2: Restart the computer
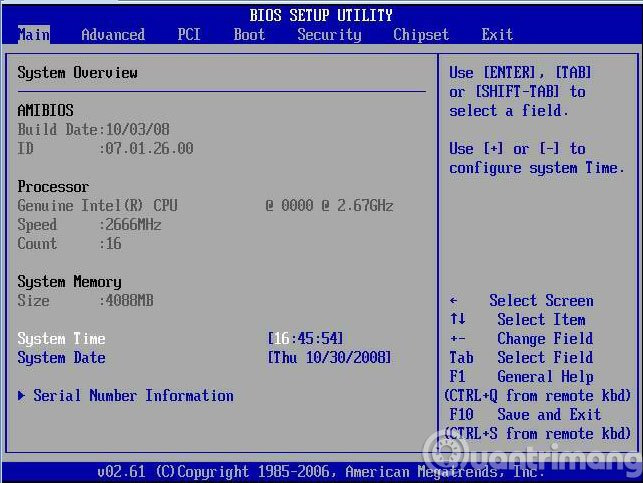
There are some machines that will automatically recognize the USB boot and boot into the operating system on the USB when restarting. If your device is not one of these, please restart the computer. During the restart process, press F2 or F12 (depending on the model) to enter the boot setup option. Boot Options Setup.
To know exactly which keyboard shortcut your computer uses to enter BIOS, refer to a few articles Instructions for entering BIOS on different computer lines.
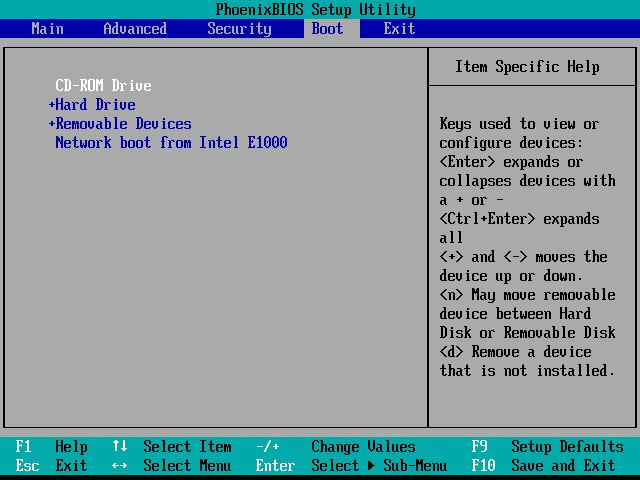
After entering the BIOS interface, use the arrow keys to navigate to the tab Boots > Removable Devices (or USB Storage Device or External Drive depending on model), press Enter to choose to load the operating system from USB.
If you need more detailed instructions, go here: How to set up BIOS to boot from USB/CD/DVD, external hard drive.
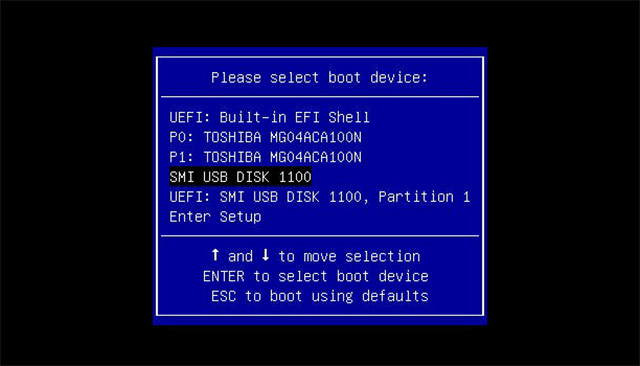
When you plug in your device, go to boot and select boot from your USB. See how to boot in all models and mainboards in the article How to boot the above machines.
Step 3: Start installing Windows 10
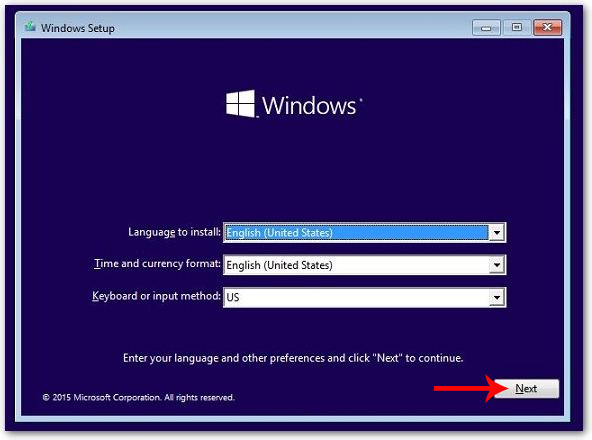
After completing the above steps, we proceed to install Windows 10. First we set the time and keyboard language. Click Next.
Step 4:
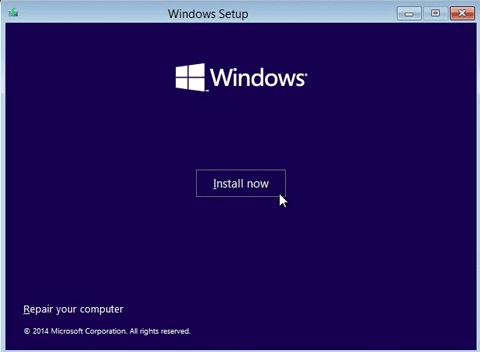
Next press Install button to proceed with the installation.
Step 5:
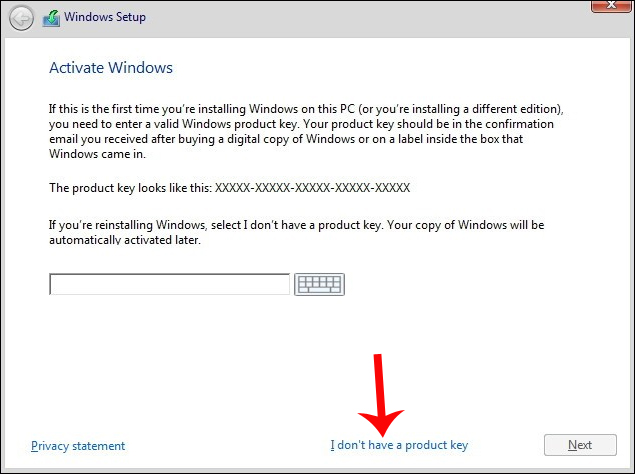
Switch to the new interface and click on the option below I don't have a product key.
Step 6:
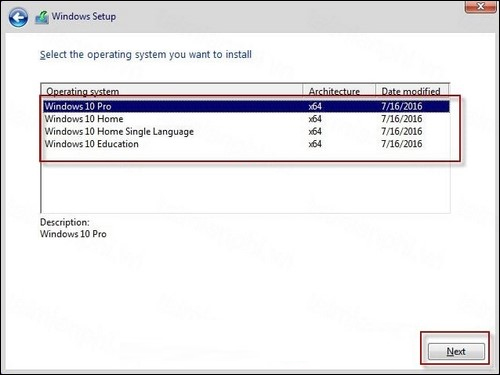
Immediately after that, we will be given the option to install the Windows 10 operating system we want from the provided list, then click Next below.
Step 7:
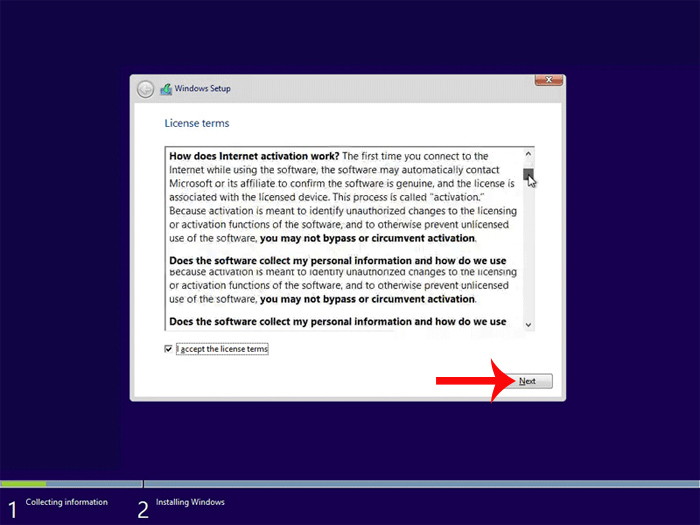
Microsoft will provide terms of use, click to select I accept the license terms then press Next.
Step 8:
Now, choose the type of Windows 10 installation process. If you want to keep your files, settings, and programs, select the option Upgrade. And if you want a “clean” installation of Windows 10 then select the option Custom (advanced).
Note: A clean install is basically a type of installation where you remove or delete all your old Windows operating files, which is a better option.
In this new interface, click on it Custom: Install Windows only (advanced).

Step 9:
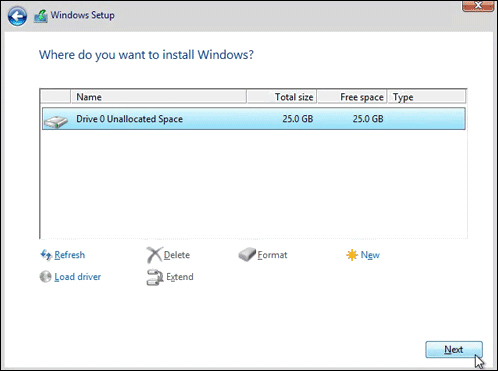
The next job is that Select the hard drive (or partition) want to install Windows 10 operating system and set it as the main boot partition. And here you will see all the partitions that were created for the previous operating system. If you want to use them, you can use them right away or create your own new partition here.
Creating new partitions will waste your time. But if these partitions are really important to you, then click Drive options (advanced)then click the button New and enter the partition size in MB (Megabytes).
When the partitions are ready, select the partition, click Format then Click Next to go to the next step.
Step 10:
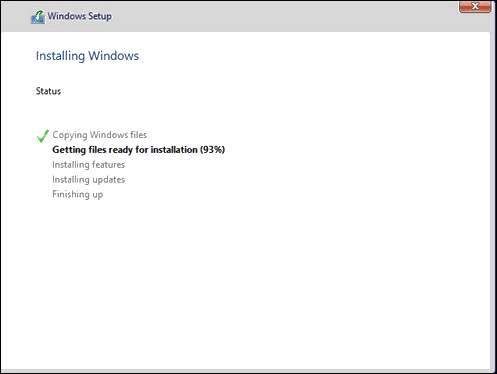
Next, the installation process will take place immediately afterward. This process will take about 10-15 minutes, depending on how fast or slow your computer configuration is.
Step 11:
When the installation is complete, the computer will reboot and return to the first-time setup screen.
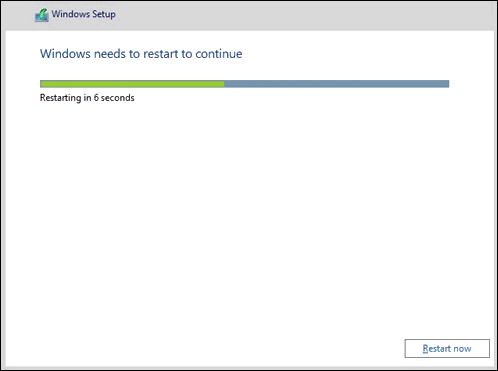
After all files are copied, and the installation of features and updates is complete. Windows 10 Setup will restart automatically and then you will see a notification Getting Devices ready.

You have successfully installed Windows 10 on your hard drive and now go to the configuration & options section.
Step 12:
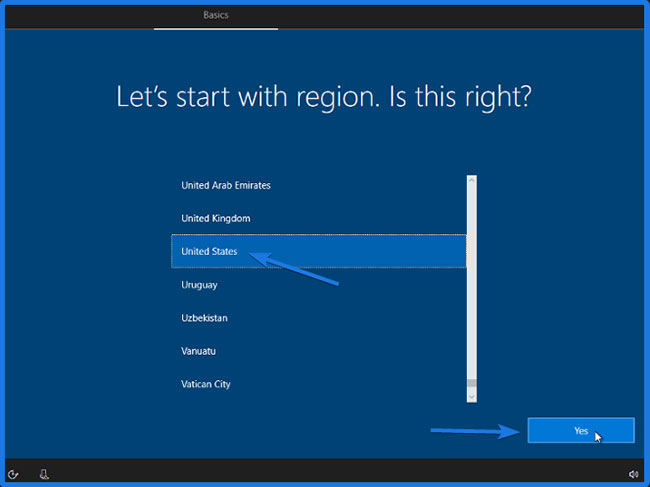
Now, after copying all the files and installing the update successfully, you will be rebooted to a new screen and it will ask for options. So choose Region To be United States or according to your preferences and click Yes.
Now, next is to choose the right keyboard layout US or English (India) and then click Yes.

And if you want to add a second keyboard layout, click Add layout or just click Skip.
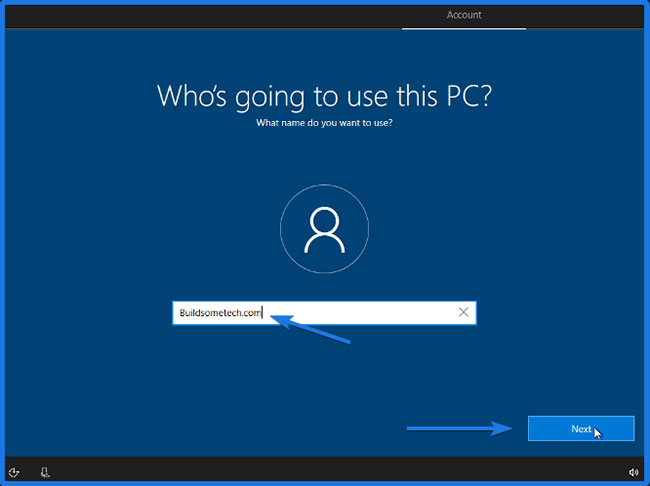
Now, the next thing is to create a new user account and password.
Step 13:
Next is to create a user account and password.
On the next screen you will be asked “Who's going to use this PC?”. So enter the user account name (Account Name) and then click Next.
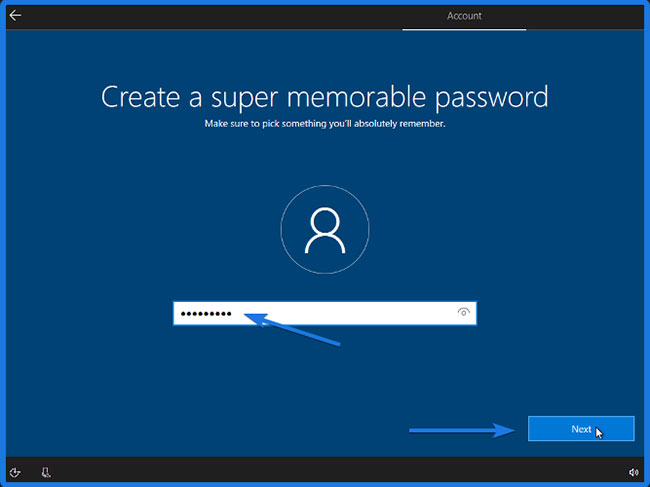
Now, let's create a super easy to remember password User Account and then click Next.
And then confirm your Windows 10 password and click Next.
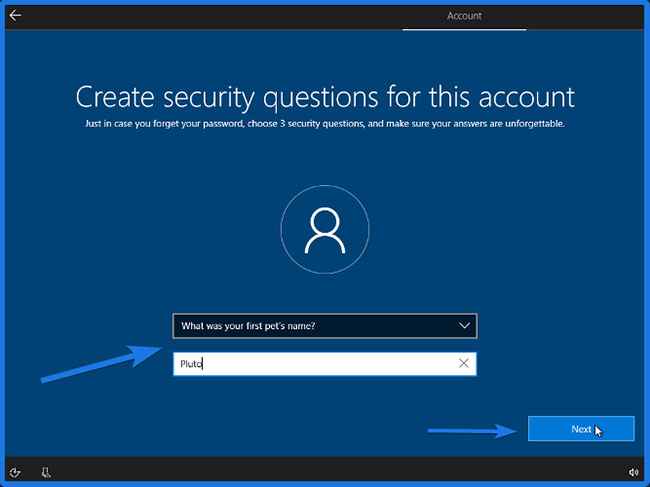
After creating a password, it will ask to create a security question for this account. So choose them wisely so you can remember them and then click on them Next.
Now let's move on to the final Windows 10 installation.
Step 14:
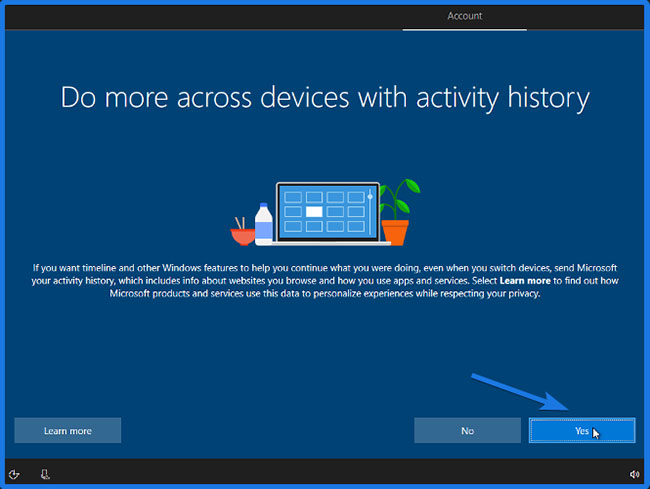
Now, on the next screen, a request “Do more across devices with activity history”, this is a Timeline feature of Windows 10. The Timeline feature keeps a record of the apps and websites you visit every day (a good option). So click Yes.
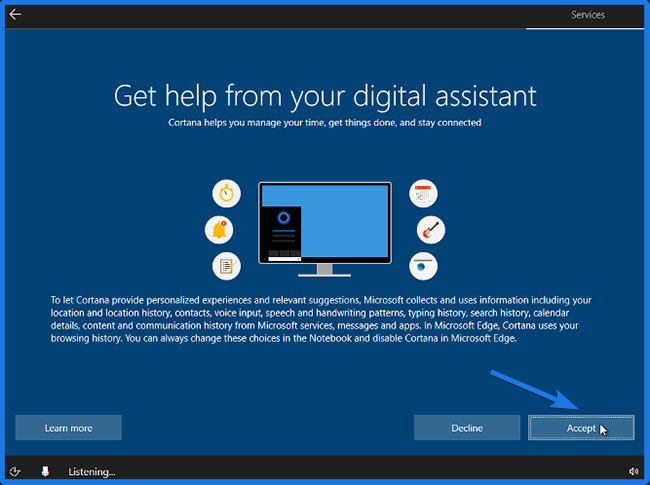
Then it will ask you “Get help from your digital assistant”, also known as the Cortana feature. This essentially acts as Google Assistant and Siri for Windows 10 users. So, click on Accept.
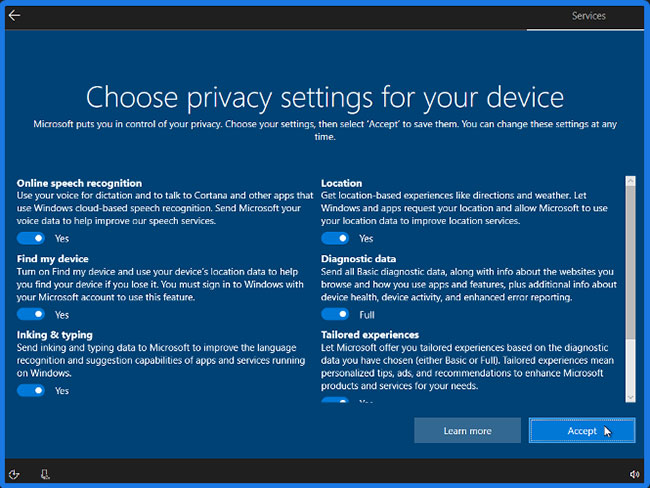
And finally “Choose privacy settings for your device” for features like online voice recognition, location, and device finder (Find my device). So choose them wisely and then click Accept.
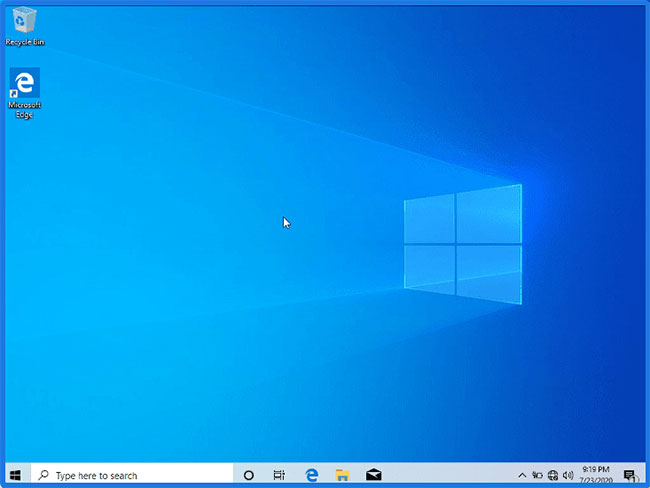
When the setup process is complete, the user will be taken to the complete Windows 10 screen interface. Now you can install any software or application to your computer.
See more articles below:
Wishing you success!
